This content was published: May 28, 2019. Phone numbers, email addresses, and other information may have changed.
Create a dynamic syllabus using Google Docs
Posted by Melany Budiman
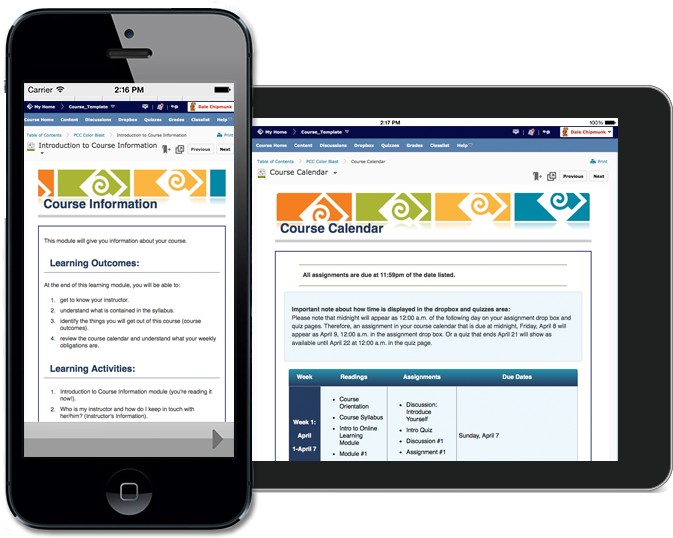 Happy May! The Spring term is almost over, and preparation for the Summer term is about to begin. Have you thought about using Google Docs to create and publish your course syllabus? If not, there are several good reasons to consider it as an alternative to Microsoft Word and as a complement to HTML!
Why would you want to use Google Docs to create your syllabus?
- Google Doc files can be created and edited on any computer or mobile device with an internet connection.
- Files edited in Google Docs automatically update saving you from having to upload a revised Word document to D2L Brightspace.
- The share function within Google Docs allows you to share a link to the document with your students before the term starts, or provide collaborative access to an administrator in your department with ease.
- When it comes time to update your syllabus for another term, you can easily make a copy of your current file, which will retain all the format and settings, without losing your previous version.
- Since your files are saved to your Google Drive account, you do not have to worry about losing your syllabus if your computer crashes or you lose your device or flash drive.
- Google Docs allows you to download your file in multiple format types, such as Microsoft Word (.docx), PDF (.pdf), Rich Text Format (.rtf), and more.
- Your students can easily save a copy of the Syllabus created in Google Docs to their own Google Drive account, or print the file for their records.
Photo by Unknown Author is licensed under CC BY-SA
How do you get started?
Convert your Word syllabus to a Google Docs
- Log in to your Google Drive and upload your Word syllabus file.
- Once you uploaded the Word file, it will need to be converted to a Google Docs. Double-click on the file, select Open with at the top of the page and choose Google Docs.

- Alternatively, if you currently don’t have one, you can download and save my syllabus template (.docx. format) or make a copy of my syllabus template (Google Docs format).
- Follow directions on how to make a copy of a Google Docs file.
- Check the formatting and make any changes
- Follow directions on how to make your Google Docs accessible.
- Note: if you used the syllabus template I linked above, then the document will already be in an accessible format. All you need to do is update the text and make it yours!
Share and post your online syllabus in D2l Brightspace
Share your syllabus file that’s now already in Google Docs.
- Open your Syllabus via Google Drive
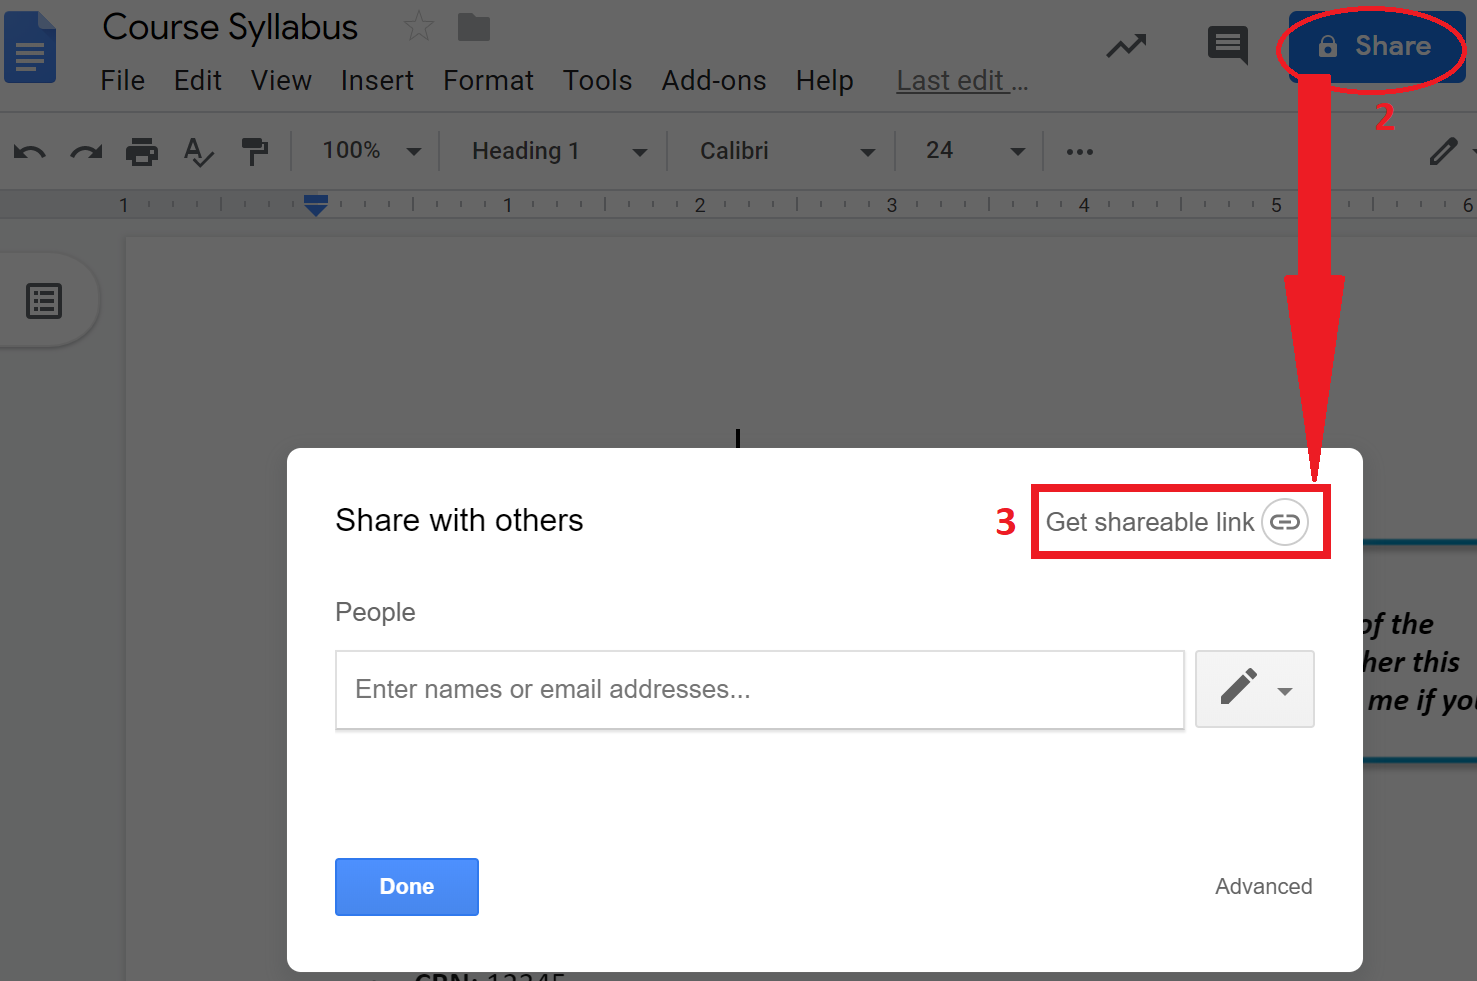
- Click the Share button at the top right
- Click Get shareable link
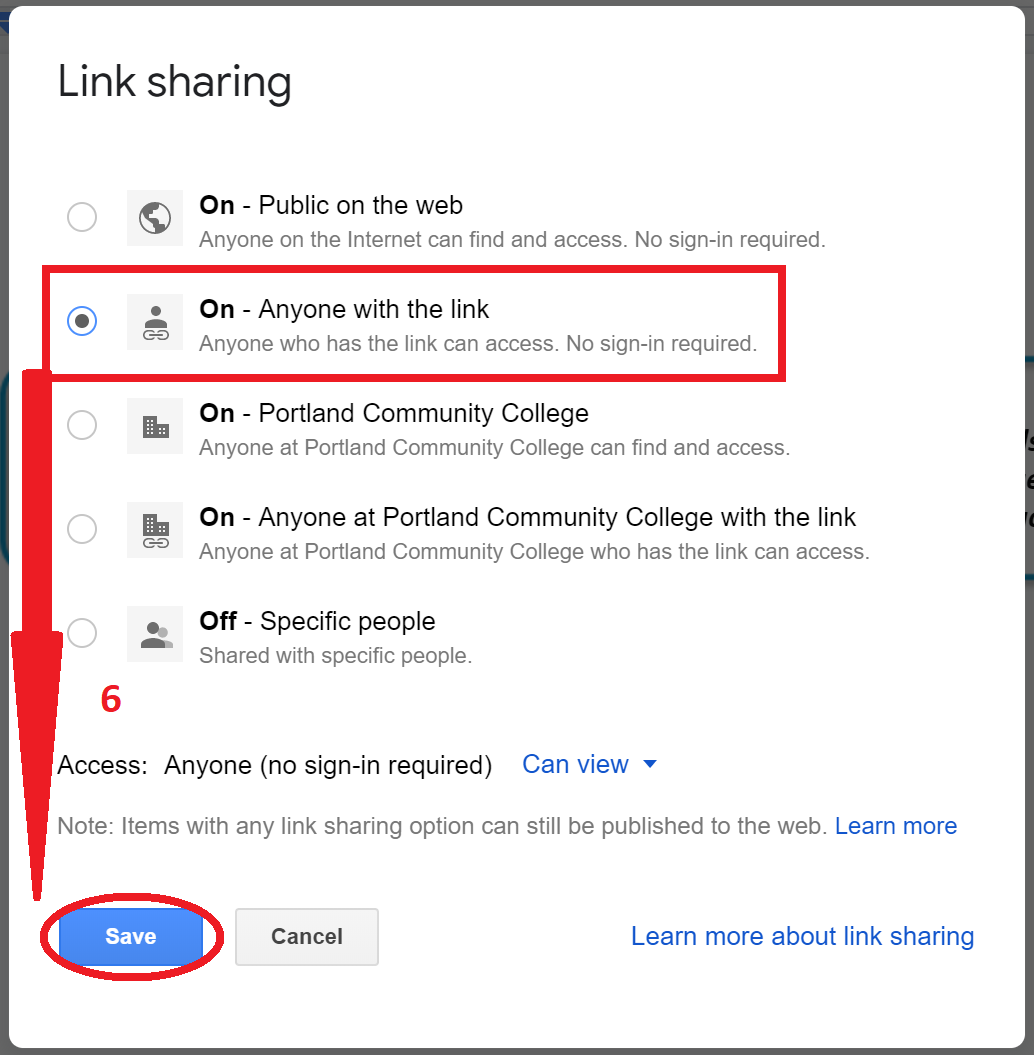
- Click the drop-down for “Anyone at Portland Community College with the link can view”
- Select More….
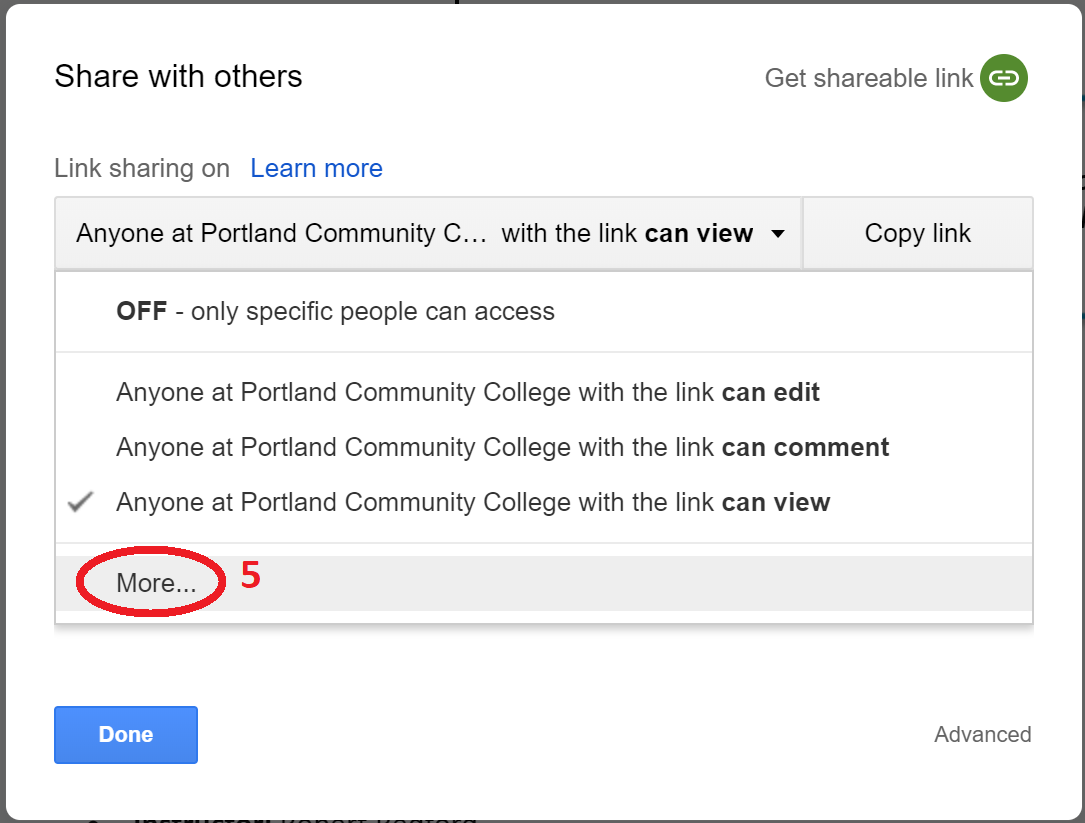
- Change the option to and choose Anyone with the link and click the Save button. This will allow anyone to view the document without the need to log in to PCC first.
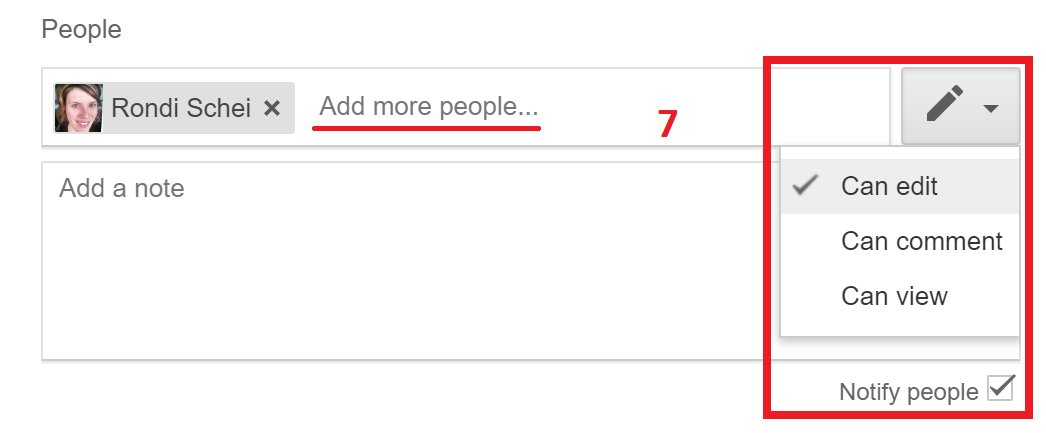
- You can share your document with other people directly by entering their email addresses under People and choose what you want them to be able to do with it: can edit, can comment, or can view.
- Edit: People can make changes, accept or reject suggestions, and share the file with others.
- Comment: People can make comments and suggestions, but can’t change or share the file with others.
- View: People can view, but can’t change or share the file with others.
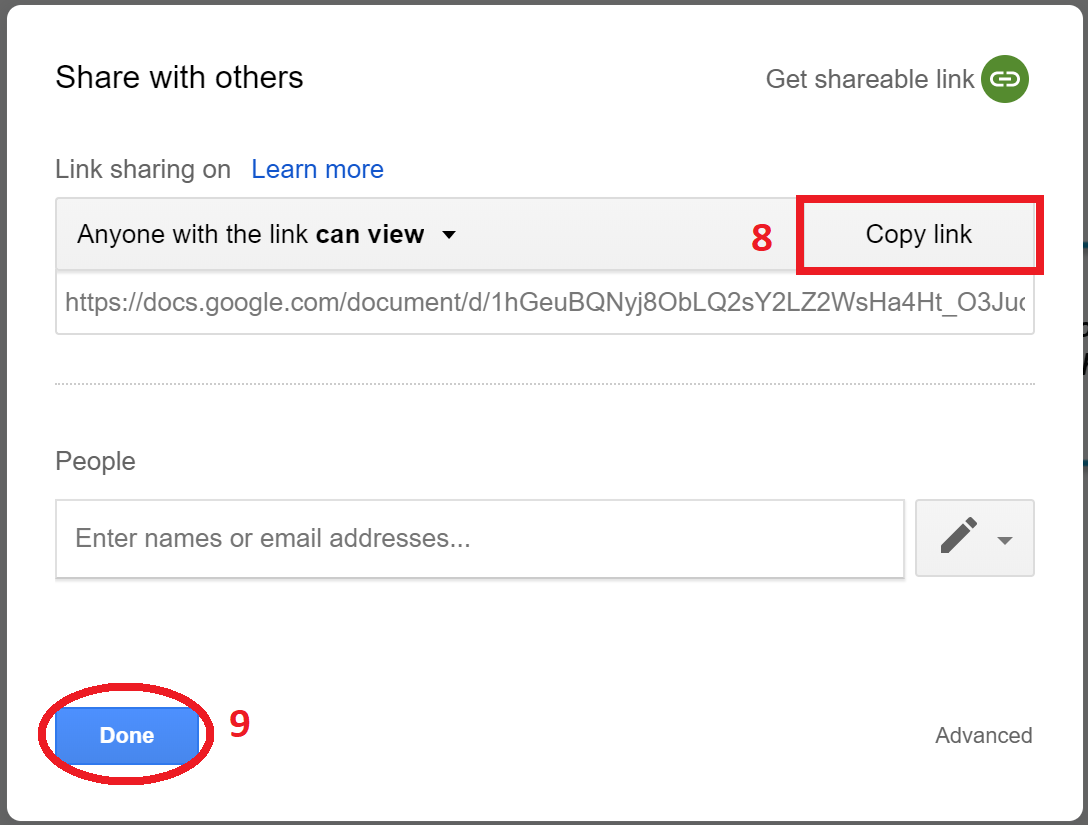
- When you’re ready to share, click Copy link to copy the URL so you can easily paste the link into your course shell.
- Click Done.
- Log in to your course shell on the D2L Brightspace system.
- Go to the Content area and click on the module where you want your syllabus to be located (i.e. Course Information module).
- Click the Upload/Create button
- Select Create a Link.
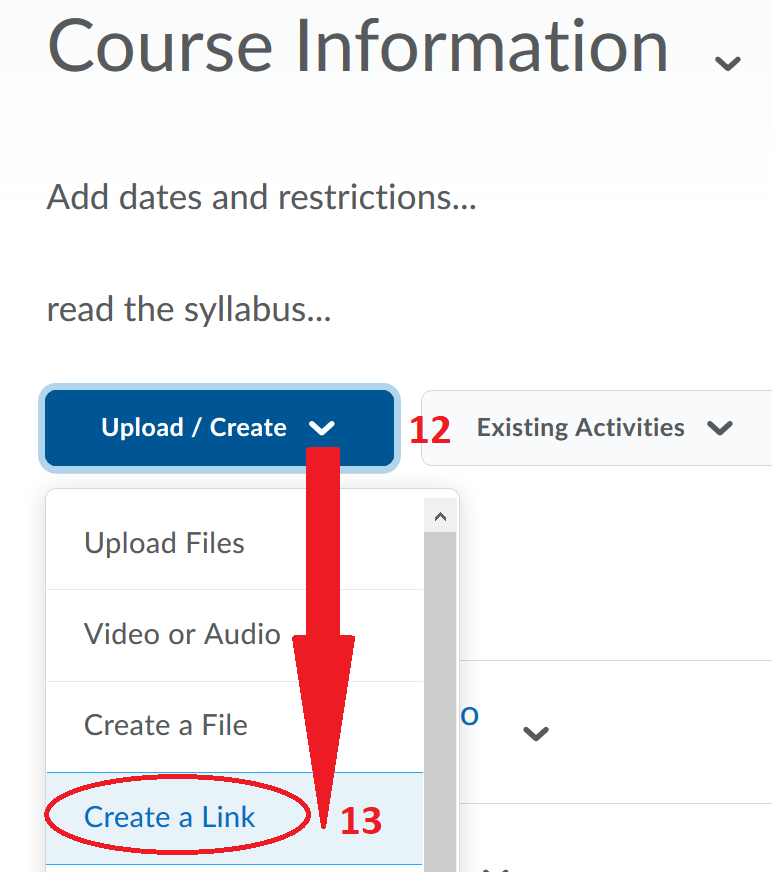
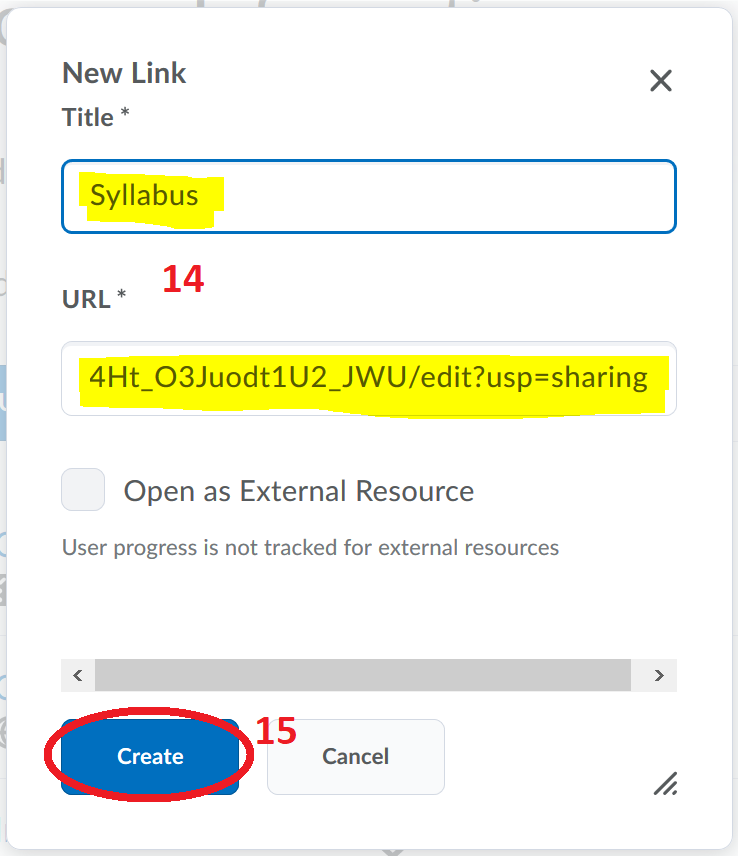
- Enter the title for the link (i.e. Syllabus) and paste the URL from Step 8.
- Click the Create button.
What your students can do with your online syllabus
Your students will be able to view your syllabus and have different options:
- Add it to their own Google Drive.
- Print the syllabus
- Download and save a syllabus file as: .docx, .rtf, .pdf, and others.

Options inside Google Docs for students
 Still have questions?
Don’t worry, if you still have any questions or need more guidance, contact the Online Faculty Help Desk (email dlhelp@pcc.edu), 971-722-8227 or contact an Instructional Technology Specialist. They are there to help you every step of the way. Good luck!