
Making Gemini Notebook Studio accessible
Currently, not all tools in the Gemini Notebook Studio are readily accessible. However, you can make Audio Overview, Video Overview, and Infographic accessible, and others not mentioned here can also be made accessible, though it’s going to take a lot more effort.
🎧Audio Overview
Video tutorial on Audio Overview (duration 21:05)
- Generate Audio Overview in Gemini Notebook.
- Download the Audio Overview by clicking More ⋮ to the right of the audio overview title and selecting Download ↓.
Tip: Only PCC users with owner or editor access to this Gemini Notebook can download the file. - Access your D2L Brightspace class and upload the file to Kaltura in “My Media”. This step can take a couple of minutes, depending on your internet connection speed and the size of the file.
- Guide on how to upload media to Kaltura.
- Guide on how to caption Kaltura audio/video.
- Guide/tip on how to change the thumbnails image. Set the media thumbnail in Brightspace (legacy).
- What type of activity do you want to do in Brightspace for this audio overview? Tip #1: Kaltura My Media guides on how to upload the media and manage captions. i.e., Create a discussion activity for the students.
- Guide on how to add new topics and forums.
- Tip: Provide instructions on what you want your students to do in the discussion. Include this: ✏️ How to view instructor’s feedback, and you can even use a Discussion rubric (1 post, 2 reply).
- Setting start, end, & due dates
- Adding a graded discussion topic
- Link a discussion to a grade item
- Cite the resources of the material & AI tools you used to produce it.
- Example screenshot: Audio overview embedded in a discussion topic activity.
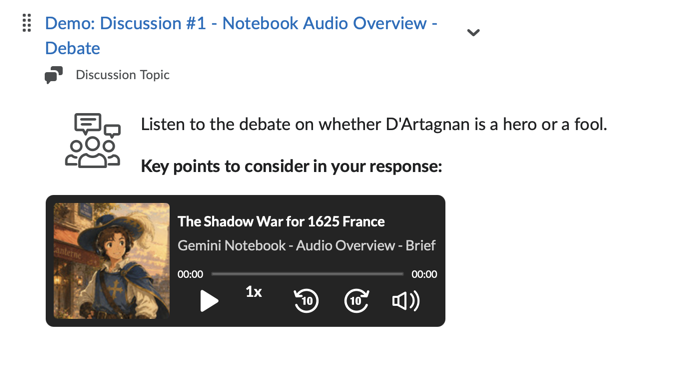
Example: Audio overview embedded in a D2L Brightspace discussion topic prompt.
- Guide on how to add new topics and forums.
- Release the material for the students in your class when you’re ready.
▶️Video Overview
Video tutorial on Video Overview (duration 7:55)
- Generate Video Overviews in Gemini Notebook.
- Download the Audio Overview by clicking More ⋮ to the right of the audio overview title and selecting Download ↓.
Tip: Only PCC users with owner or editor access to this Gemini Notebook can download the file. - Access your D2L Brightspace class and upload the file to Kaltura in “My Media”. This step can take a couple of minutes, depending on your internet connection speed and the size of the file.
- Guide on how to upload media to Kaltura.
- Guide on how to caption Kaltura audio/video.
- What type of activity do you want to do in Brightspace for this video overview? Tip #1: Kaltura My Media guides on how to upload the media and manage captions. i.e., Create a lecture page with the Video Overview for the students.
- Tip #1: Follow instructions in creating a new HTML file based on an existing file to create your lecture page.
- Tip #2: Cite the resources of the material & AI tools you used to produce it.
- Example Screenshot: Video overview embedded in a content page.
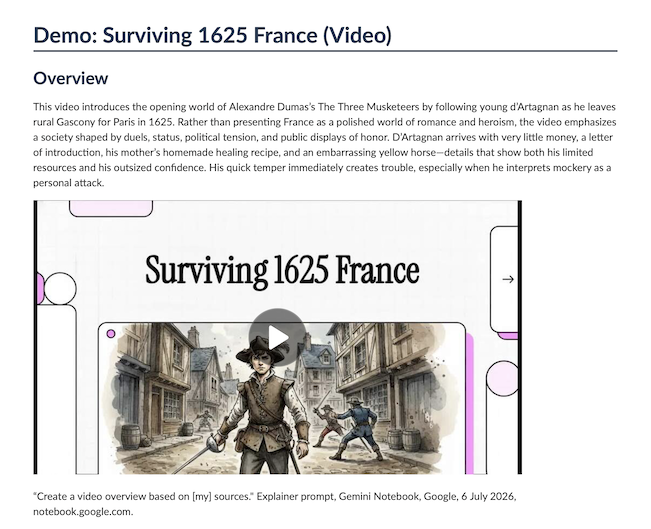
Example: Video overview embedded in a D2L Brightspace discussion topic prompt.
- Release the material for the students in your class when you’re ready.
📊Infographic
Video tutorial on Infographic (duration 9:29)
When building an effective Gemini Notebook, how your source material is formatted matters just as much as what’s in it.
- Go your Google Apps Workspace and select Gemini Notebook
- Click the Create New Notebook button or open an existing workspace.
- Upload your materials to the Sources panel on the left. You can upload the following: PDF files, Google Docs, or Slides.
- YouTube video URLs (great for turning video lectures into visual study guides).
- Web links or pasted text notes.
Isolate your topic:
By default, Notebook uses all uploaded sources. To build an infographic on a specific lesson, uncheck all other sources in the left panel and check only the relevant files.
Access the Infographic Generator
Once your sources are selected, navigate to the creation studio.
- Look at the right side of your screen and locate the Studio panel (this is the same area where the Audio Overviews/podcasts are generated).
- (a) Find the Infographic section and (b) left-click the right-facing arrow to open the creation interface.
Customize Your Design & Style
Before generating, you can customize how the infographic will organize your lesson data.
- Detail Level: Choose between Concise, Standard, or Detailed depending on the complexity of the topic.
- Orientation: Select Square, Portrait (best for posters or mobile viewing), or Landscape (best for slide decks).
- Visual Style: Gemini Notebook offers predefined artistic styles. Popular options for educators include:
- Scientific: Great for STEM, processes, and lab structures.
- Bento Grid: Organizes different sub-topics into neat, modular boxes.
- Sketch Note: Offers a hand-drawn, highly engaging classroom vibe.
- Professional / Editorial: Ideal for business, history, or humanities readings.
Custom Prompt (Crucial Step): Tell the AI exactly what to focus on.
- Example prompt: “Create a timeline infographic of the 4 stages of mitosis using a cool blue color palette. Highlight the key vocabulary words.”
- Example prompt: “Summarize the core arguments of the reading. Use a Professional style and limit text to short bullet points.”
Click Generate. The infographic will build in the background, which usually takes 1 to 2 minutes.
Downloading, Converting, and Uploading
Save and Download
Once your infographic is ready, open it in the viewer to export or distribute it.
- Click the three dots menu next to your generated infographic.
- Option A: Download as PNG. This is the most reliable method. You can easily upload this image file directly into Canvas, Blackboard, Google Classroom, or drop it into your lecture slides.
- Option B: Convert to JPEG. A PNG is a large file. If you open up the downloaded infographic in Paint, PowerPoint, or Preview for the Mac OS, you can save the file as a PNG as a JPEG (which is an inherently smaller file) before uploading and embedding it into your Brightspace Course Content.
Tips:
- Banner image in Content area: 1200 pixels wide x 300 pixels high.
- .jpg is preferred over .png images – .png files are bigger and will take longer to load on the webpage, which is an issue for students with slower internet or limited data plans.
Upload, Embed, and Share with Students
Follow these steps to insert a .jpeg image directly into your HTML content page:
Open Your HTML Editor
- Navigate to your course site in Brightspace.
- Go to the Content area (or wherever you want to add the image, such as an Announcement, Discussion, or Assignment).
- Open the page you want to edit and click Edit HTML (or select Upload/Create > Create a File to start a new page).
- Position Your Cursor. Click inside the main text box to place your cursor exactly where you want the image to appear.
- Click the “Insert Image” Button. On the HTML Editor toolbar (top-left), click the Insert Image icon. (Note on how to find it: The icon looks like a small mountain range within a square. If you hover your mouse over the icons, a tooltip will pop up saying “Insert Image.”)
- Add Accessibility, Alt Text, and/or a detailed description. Brightspace will prompt you to make your image accessible for all learners:
- Alternative Text: In the text box, write a brief, clear description of what is in the image (e.g., “Graph showing 2026 climate trends”). You can manually add the alt-text–or you can use AI to generate a description, like Gemini or the ASU Image Accessibility Creator.
- Decorative Image: If the image is purely decorative and does not contain instructional content (like a divider line or a generic header), check the box that says “This image is decorative.”
- Complex Images/Detailed Descriptions: For complex infographics, simply adding alt text is not enough. You should provide a more detailed description either above or below the graphic. In D2L Brightspace, you can easily add this description within a Creator+ Accordion right above the infographic.
- Save and display. Click Save and Close (or Save) at the bottom of the editor window to publish your changes. Release the material for the students in your class.
- Example Screenshot: Infographic embedded in a content page.
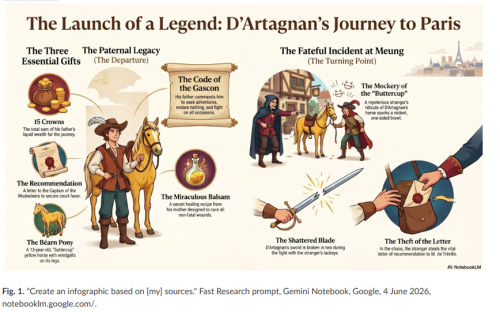
Example: Infographic depicting D’Artagnan’s journey with sections on his essential gifts, paternal legacy, and key incidents, including a brawl and a stolen letter, with colorful icons and descriptions.
Support
- Contact an ITS to schedule one-on-one training.
- Students should contact their instructor or the Learning Technology Help Desk student support.