Using Video Note in D2L Brightspace
Video Note is an D2L tool that allows a simple way to record video or audio using your computer’s webcam or a microphone and instantly publish it in your D2L course. You may find this new feature helpful when you want to add media content, create a more personal touch, or improve engagement with your students. It also offers the option to upload a video file created with a digital camera, smartphone, or other video capture device.
- What is required: A D2L Brightspace course and a camera or microphone connected to your computer.
Audio and video recordings can include automatic closed captions.
Please explore Modifying Video/Audio Note Captions and Auto-captions
Instructors can use Video Note to do the following:
- Create a new topic in the Content area
- Add a Description to a Module or a topic in the Content area
- Create an Announcement on the course Homepage
- Provide Instructions when creating instructions for Assignments in D2L
- Provide feedback on students’ Assignments
- Give a description of a new topic in Discussions or make a post on a Discussion topic
- Give students feedback in the Gradebook
- Compose an email inside of D2L
- and any other place where the D2L HTML editor is available
Video Note is also available for students in these areas:
- When adding comments to uploaded assignments in a Submission folder
- When posting a new thread or replying to someone’s thread in the Discussion topic
- Composing an email inside of D2L
We find the Video Note tool is the easiest video solution currently available in D2L.
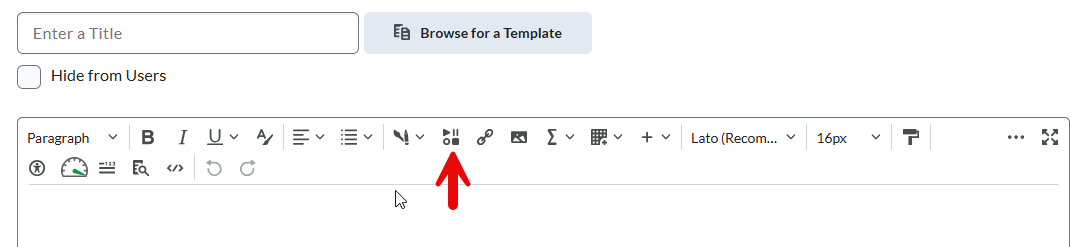
This tool can be used anywhere in D2L where you can find the standard HTML editor like this one:

Limitations
- The recordings with Video Note are limited to 30 minutes. It might be just enough for a basic announcement or feedback. If you are looking to create longer videos, please consider using Kaltura. Files uploaded on Kaltura can be embedded by instructors in all the applications mentioned above, but this tool is not available to students.
- Videos are automatically removed after 6 months
- Recordings posted in Content, Assignments, and Discussion topic details can be copied from course to course. But since they have a limited storage time it’s a better idea to have longer-term videos created and uploaded on Kaltura.
You can download the files created by Video Note and upload them to the MyMedia area in D2L for permanent use later in other courses.
Creating Video Note
- Open an HTML editor anywhere in mentioned above applications and locate Insert Stuff tool in the middle of the tool bar.
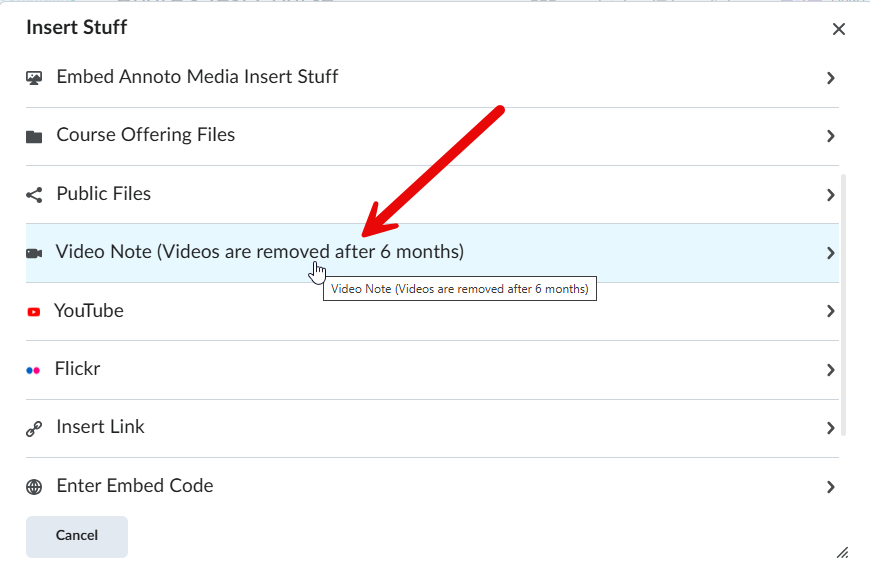
- Click on Insert Stuff icon and a new window will pop up. Locate Video Note (Videos are removed after 6 months) option and click on it.
- After you start the Video Note tool, and you should be able to see your computer’s webcam video on the screen. You may need to give your browser permission to access your webcam and microphone. You can start New Recording.
On this screen you can choose the option for Audio only to record some audio instructions or an announcement .
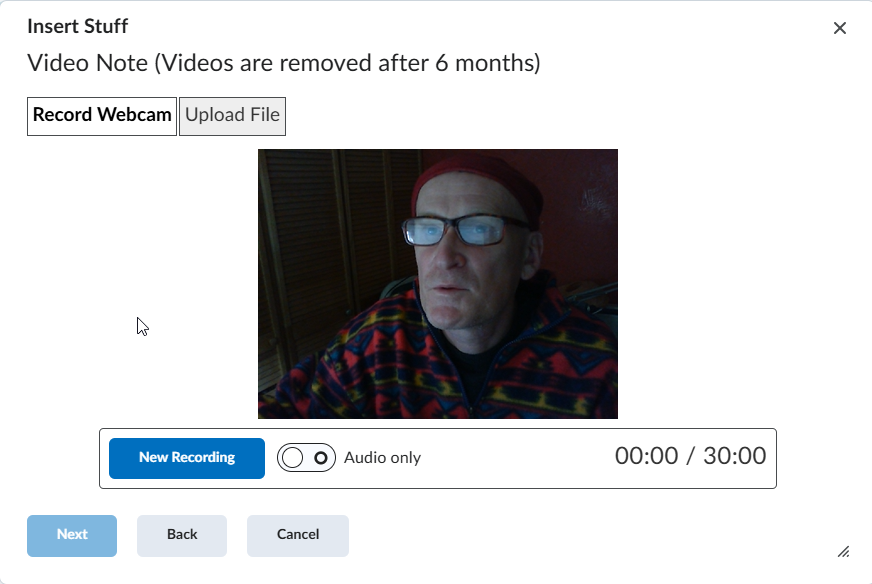
- Click on New Recording to start the recording
- Click Stop Recording to finish.

- Now you can review the recording you made. Roll the cursor over the video and you should be able to see the video player’s controls for adjusting the audio volume, to pause/play the video and play video on the full screen.
You will also find the Download option under 3 dots on the right side of the screen.
If you don’t like your recording, click New Recording for another take.
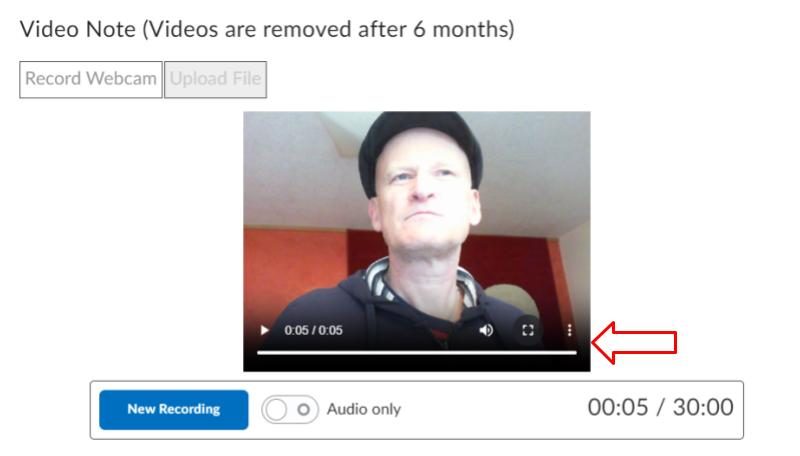
- Click on Next button at the bottom of this screen to proceed to the next step.
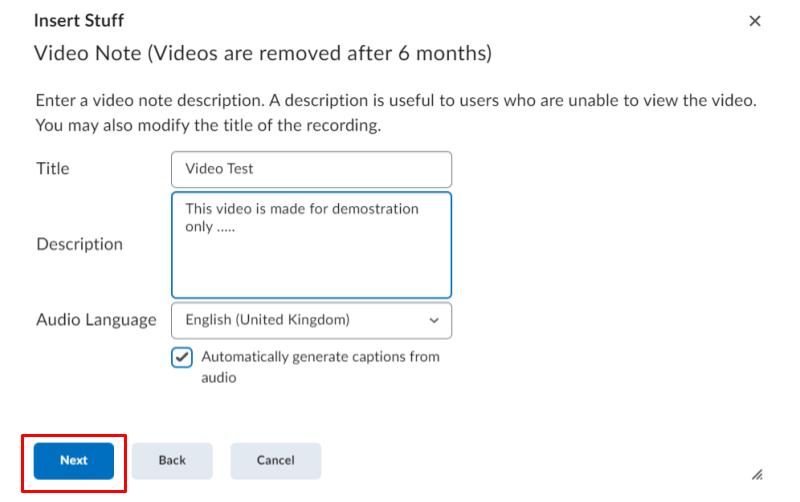
- On the next screen, provide Title and Description (Descriptions are optional) for your recording.
Choose Audio Language for captions and select Automatically generate captions from Audio.
Select Next to confirm.
- The next screen will inform you that the Media is being processed. You can click on Refresh Preview to review the recording again.
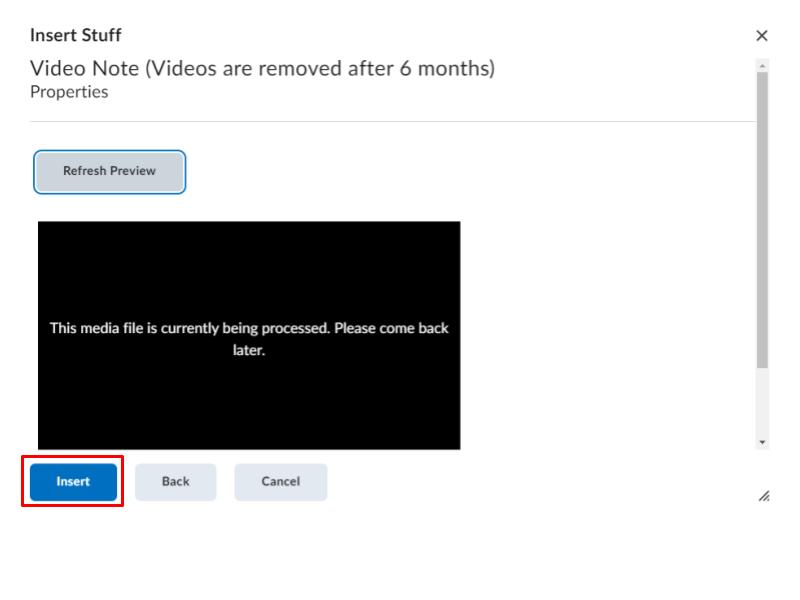
- You don’t have to wait for D2L to transform the video. Click Insert button, that will place your video on the page.
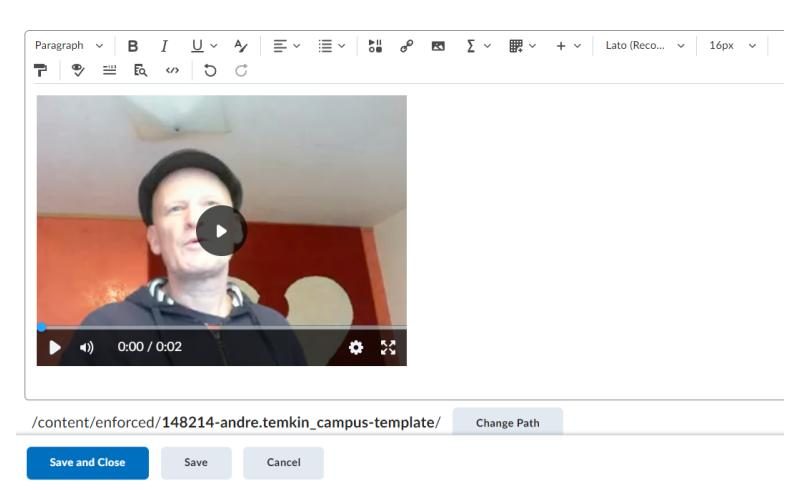
The video will appear when it is ready. - Finish your post and close HTML editing by clicking on Save or Save and Close button:
- Now you and your students should be able to see the video post. The video player will have controls for adjusting the audio volume, to pause/play the video and play video on the full screen.
Playback speed can be varied from 0.25 to 2 times of the original speed. You and find this control and the Download option under the “gear” icon on the bottom right corner of the player.
Video demonstration using the Discussion tool
- Video tutorial for students: Submitting a video file as an Assignment in D2L