Using Zoom for public meetings
Zoom has become an essential tool for conducting college business. If you wish to use Zoom to host public meetings, we have some recommendations for how to set up your meeting to ensure a successful event. Having a meeting open to the public is an inclusive way conduct your work, but it also comes with the risk for disruptive behavior from participants (so called Zoombombing). This guide will help you configure your meeting in a way that will reduce the chance of unwanted guests disrupting your meeting and harassing other participants.
There are two major event types, webinars and meetings. We have a limited number of webinar licenses so this guide will largely focus on how to configure a standard meeting.
Webinars
Benefits of using Webinars
- Moderated Chat
- Moderated Q&A features
- Hide participant list
- Great for broadcast format events (presentations)
- Can use Break-out rooms
We strongly recommend requesting support through Media Services to get support hosting webinars. They will help you plan for and manage your webinar as well as help you navigate what you might want for your public event.
Webinars are only available through Media Services, but can host up to 500 participants. If you’re not sure which one to use, see the comparison between meetings and webinars.
Public Meetings
If you want to manage your own meetings that are open to the public, there are a few things you can do to improve the safety of your event. We recommend the following settings for your meeting to reduce the chance of unwanted guests.
Remember to request captioning for public events in advance!
We recommend that you update your Zoom Client (Option 3) once a week.
Require Event Registration
This requires that participants register for your event with their name and email address. This way, you know who will be attending ahead of time. Learn more about registration in Zoom.
Use a Passcode
Passcodes add another layer of security to your meeting. It prevents people from randomly guessing your meeting based on the meeting ID. Meeting invites that you send will include the passcode, and in some cases, participants won’t even need to enter the code to join if they use your calendar invite or meeting invite.
You can customize your passcode when creating the meeting. We recommend using digits for participants who connect via phone bridge.

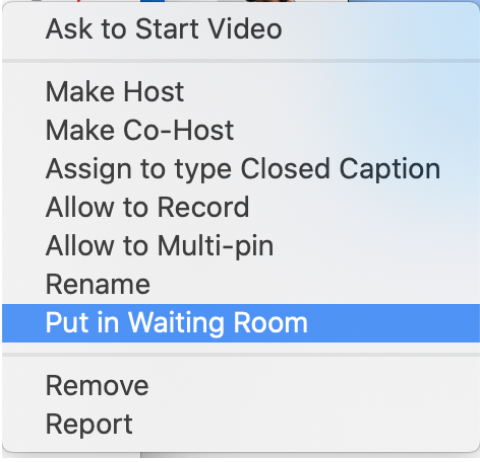
Use a Waiting Room
Waiting Rooms allow you to review who is trying to join the meeting before they can enter. This is a popular feature for instructors who want to make sure they recognize the names of participants. You can even chat with people in the waiting room if you don’t recognize their name. Learn more about Waiting Rooms.
You can customize your waiting room from the Settings in the PCC Zoom website.
You can also send users back to the waiting room if they aren’t adhering to your community standards. This can be done from the participant panel.
Muting participants
We recommend that you change your default setting to “mute participants upon entry” when scheduling your meeting.
Limit participants from unmuting themselves
By default, participants are able to unmute themselves. To switch this off during the meeting, go to the Security button and under Allow participants to and deselect unmute themselves.
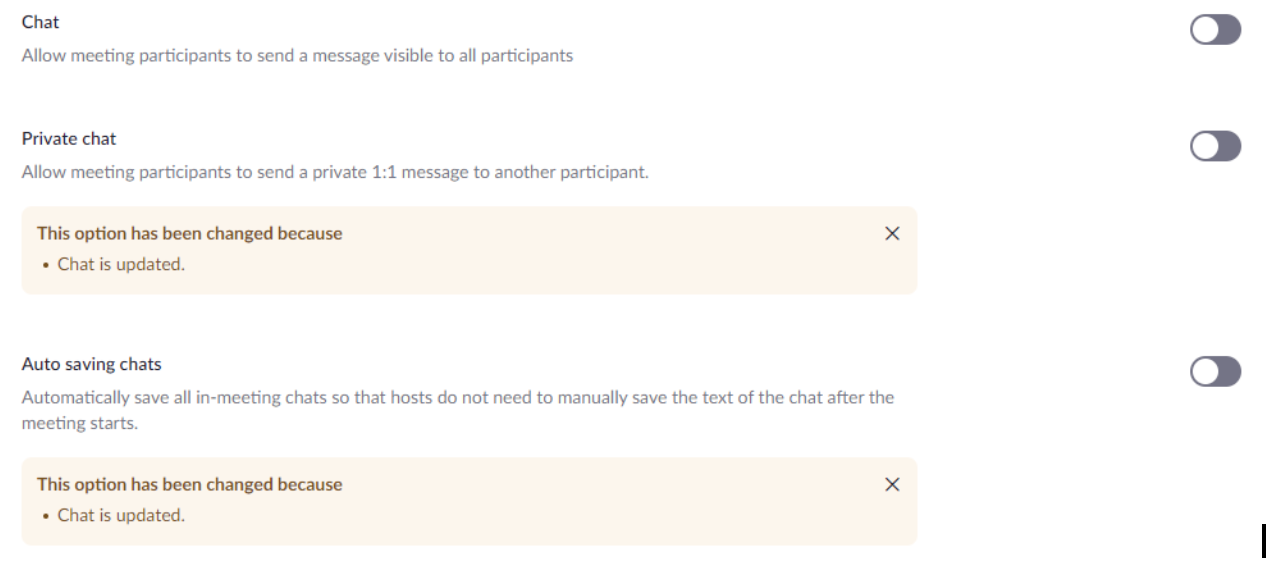
Limit who can Chat
Chat is a great way to interact with participants, but it can also be distracting or interrupt the flow of your meeting. If you’re hosting a public meeting and don’t want your participants to chat freely, you can make it so that your participants can only chat with hosts. This allows the host to receive questions from participants without everyone seeing the questions.
Option 1: Change chat settings in the PCC Zoom web portal:
Option 2: Change Chat settings inside Zoom meeting:
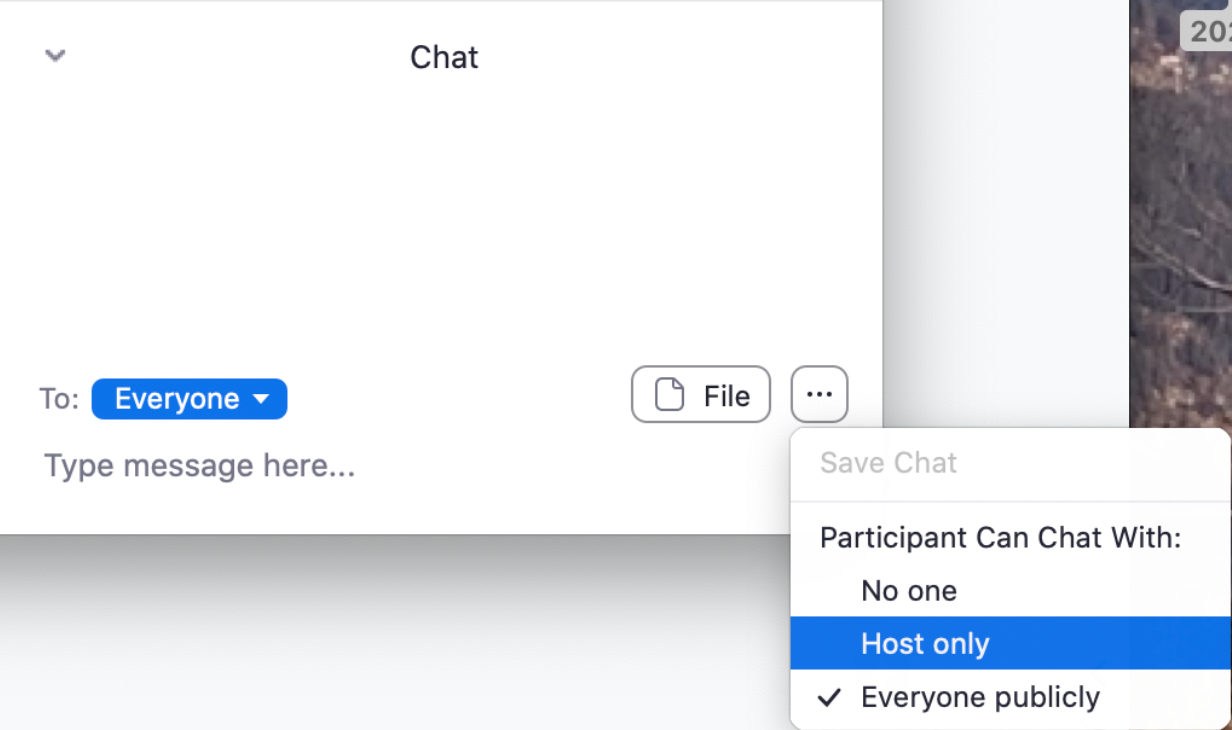
In the Chat panel, click the … (more) icon and choose Host only.
Require Authentication
You can require all participants to be logged in to their Zoom account if they want to join your meeting. This means they can log in with their PCC account or with a Zoom account from any other school or private account. This can discourage malicious participants from joining, but it can also create a barrier for non-Zoom users from joining. We tend not to recommend this setting unless you want an additional layer of security.
Screen sharing
By default, screen sharing is only available to the host or co-host. We recommend against allowing participants to share.
To allow any participant to share, you can click on the arrow next to the Participants option, and under Who can share? select All Participants
Annotation
By default, only the host can use the annotation tool while sharing their own screen. You can completely turn off using Annotation in the Settings.

Reporting a participant
If you have a disruptive participant during the meeting, you can Report using the Participants option in the participants window. Select the participant from the list of users, choose the reason, and submit it to Zoom’s internal security team.

Internal Meetings
Internal meetings are events intended for PCC staff and students. They may be more secure by virtue of the fact that participation is limited, but if you publish meeting access info publicly, you should treat it like a public meeting. If you have a limited set of participants and want to relax some of the security settings, you can do so. Below you will find our recommendations.
We recommend that you update your Zoom Client (Option 3) once a week.
Zoom web portal settings
Here are the account settings you can set at portlandcc.zoom.us. We recommend that these apply to all meetings:
- Mute participants upon entry
- Always show the meeting control toolbar
- Identify guest participants in the meeting/webinar
In-meeting settings and controls
Here are the in-meeting settings we recommend for internal meetings. These settings only apply to the meeting you are in.
- Click the Security button, allow participants to (by checking each one)
- unmute themselves
- rename themselves
- share screen, and
- Annotate on shared content (note: annotate on shared content will only appear as an option while sharing)