Using the Announcements
The Announcements tool enables you to create news items that help communicate course updates, changes, and new information to your students quickly and effectively. Since My Home or Course Home is the first page that users often see when they log in or access their courses, the Announcements widget is a good area for displaying important information. You can use Announcements to welcome students to the course at the beginning of the term, let them know of any important deadlines or materials that have been added to the course.
- What is required: A D2L Brightspace course and an Announcements widget
Important Notes
Keep your course announcements clear and easy for students to follow:
- Limit Visible Announcements: Show 3 to 5 announcements on your Course Home. Too many posts cause students to glaze over critical updates.
- Set End Dates: Assign end dates to organize your page and save reusable posts for future terms.
- Understand Notifications: The Announcements tool does not automatically email students.
- Remind Students: Direct students to check their Update Alerts in D2L Brightspace or adjust their notification settings.
What can you do with the Announcements tool?
Option 1: Create an announcements item
- Follow these directions to learn how to create an announcements item
Note:
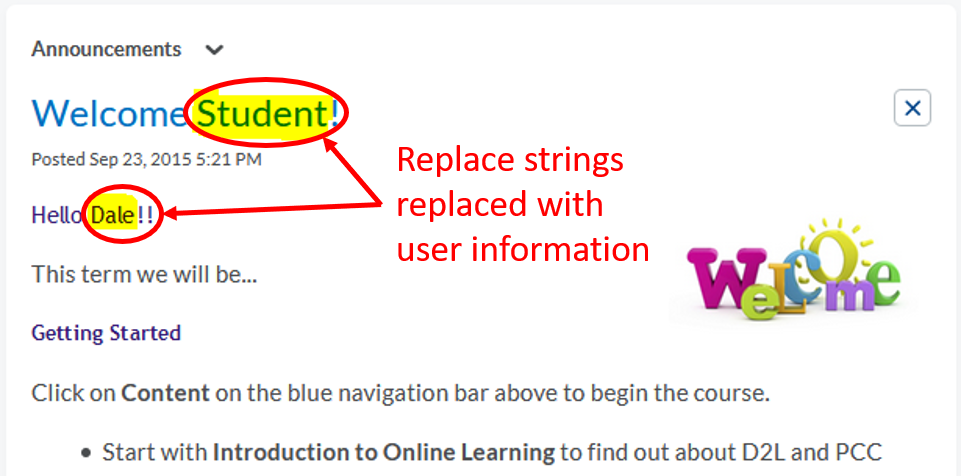
- You can use a replace strings and add it to the text field or HTML editor area inside D2l of the Announcements tool (like in the Headline or Content). Then later when someone views your Announcement, D2l will replace the strings with the appropriate information about that viewer.
- Replace string: {FirstName} will display the viewer’s first name
- Replace string: {LastName} will display the viewer’s last name
- Replace string: {UserName} will display the viewer’s username in D2l
- Replace string: {ExternalEmail} will display the viewer’s email address
- Replace string: {RoleName} will display the viewer’s role in your course
For example: In the Headline, we add {RoleName} and in the Content, we add {FirstName}

When a student views this announcement, the Headline will show Student and the Content will show the student’s first name
- If you check the box for Send Email Copy, a copy of the content in the announcement will be sent to all users in the Classlist as an email from you when the announcement is published. Note: Any embedded media (video, images, etc.) and any Equations in the Announcement will not be visible in the email message. Students can still see the announcement in the D2L class.
- Save as Draft saves the announcement for future editing and not visible for students. Publish will release the announcement on the Course Home, and it is visible to students
Video Tutorials:
- how to create an announcements item
- how to make a regular announcements
Option 2: Edit an existing announcement
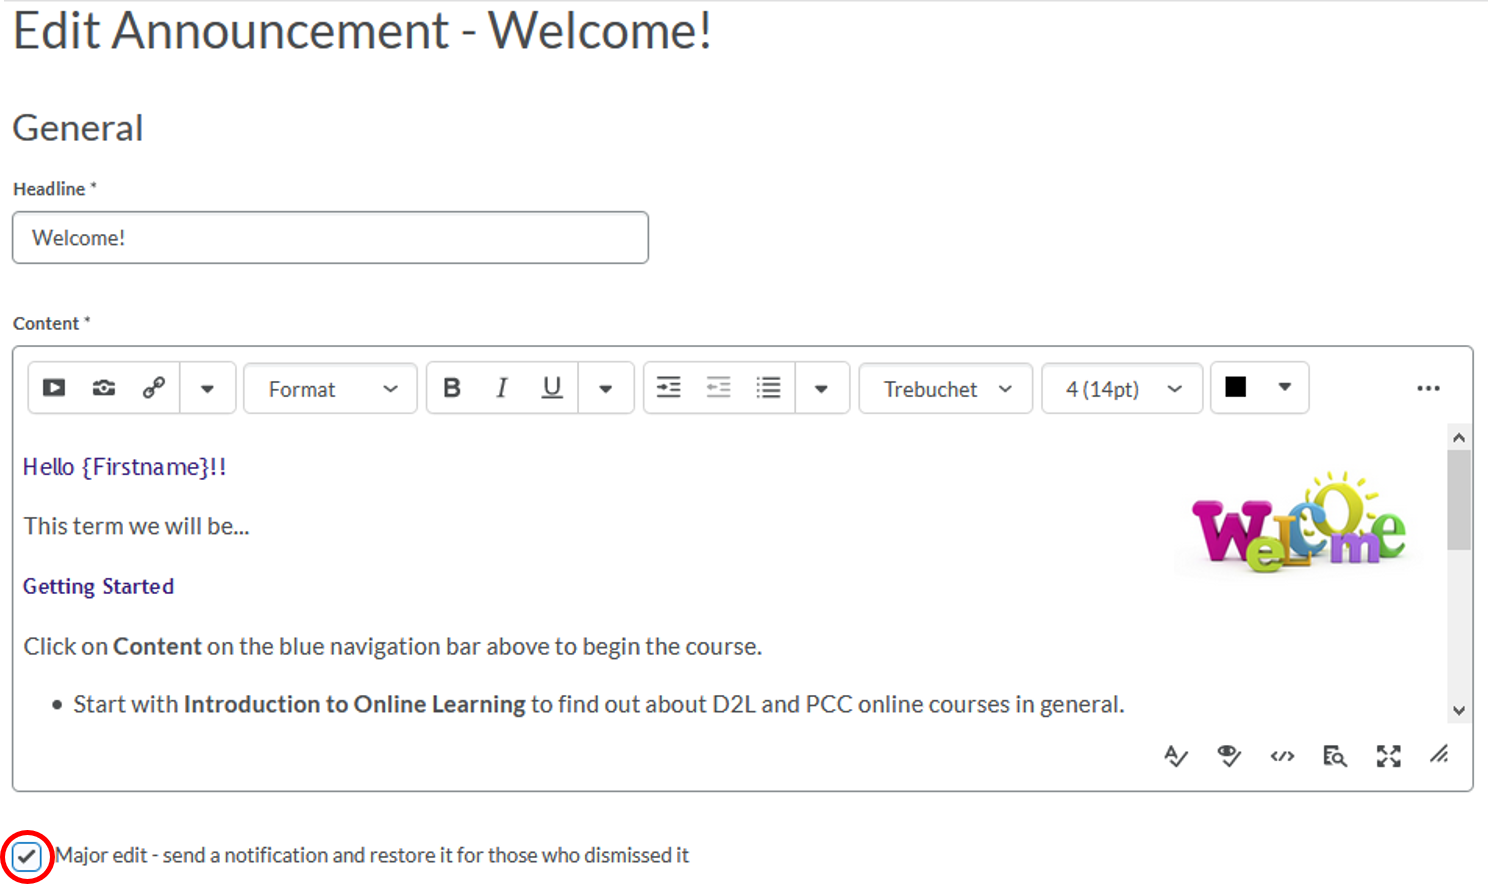
Note: When editing an announcement, you can choose to check the box for Major Edit – send a notification and restore it for those who dismissed it, right below the Content of the announcement (where you write your message). This allows your announcement to be treated as new, will be visible to those who previously dismissed this announcement, and also sends a notification to your students
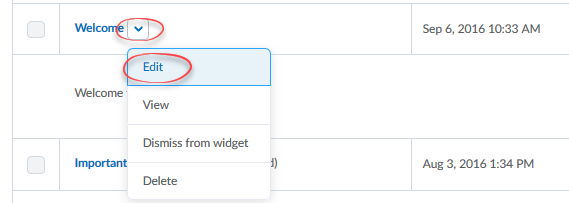
- Click on the Course Home link from the course navbar
- Find the announcement:
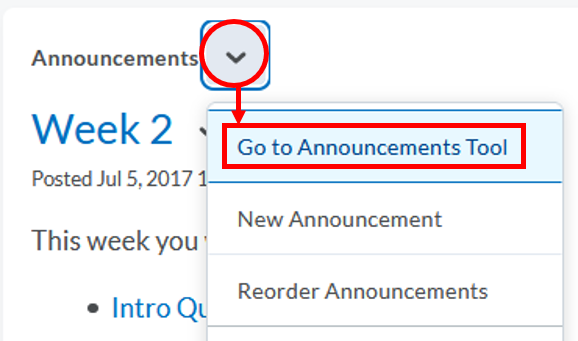
- If you see the announcement that you want to update available on the page, click on the drop-down arrow next to the announcement’s title and select Edit.
- If you don’t see it listed on the Course Homepage, click on the drop-down arrow next to the Announcements and select Go to Announcements Tool. Once you find the announcement you want to update, click on the drop-down arrow next to the announcement’s title and choose Edit.
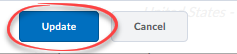
- Make your changes and click on the Update button
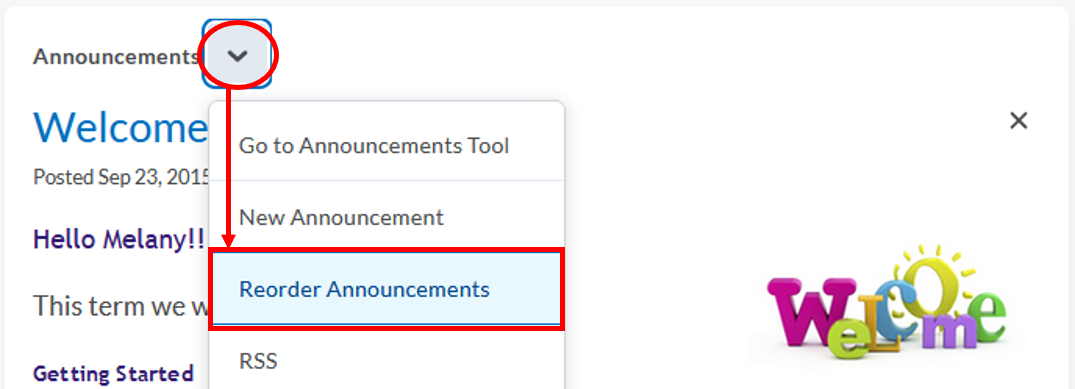
Option 3: Reorder announcements
- Click on the Course Home link from the course navbar
- Click on the drop-down arrow next to Announcements and select Reorder Announcements
- Use the Sort Order drop-down list to select the order you’d like each announcement to appear. Other items will automatically reposition themselves according to the new order
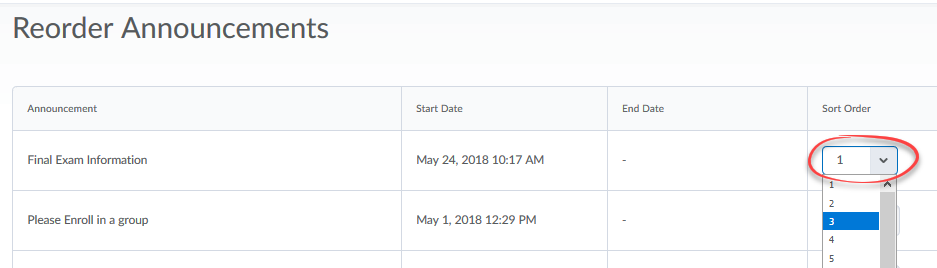
- Click on the Save button
Option 4: Dismiss an announcement & restore dismissed announcement
Dismiss option is a personal setting to remove an announcement from the Announcements list because you do not want to see it anymore. When you dismiss an announcement on your course, it doesn’t mean it will remove it for your students. If you want to not make it visible for the students, you can either delete the announcement or set an end date.
Option 4a: Dismiss an announcement
- Click on the Course Home link from the course navbar
- Click on the X to the right of the Announcement you would like to dismiss
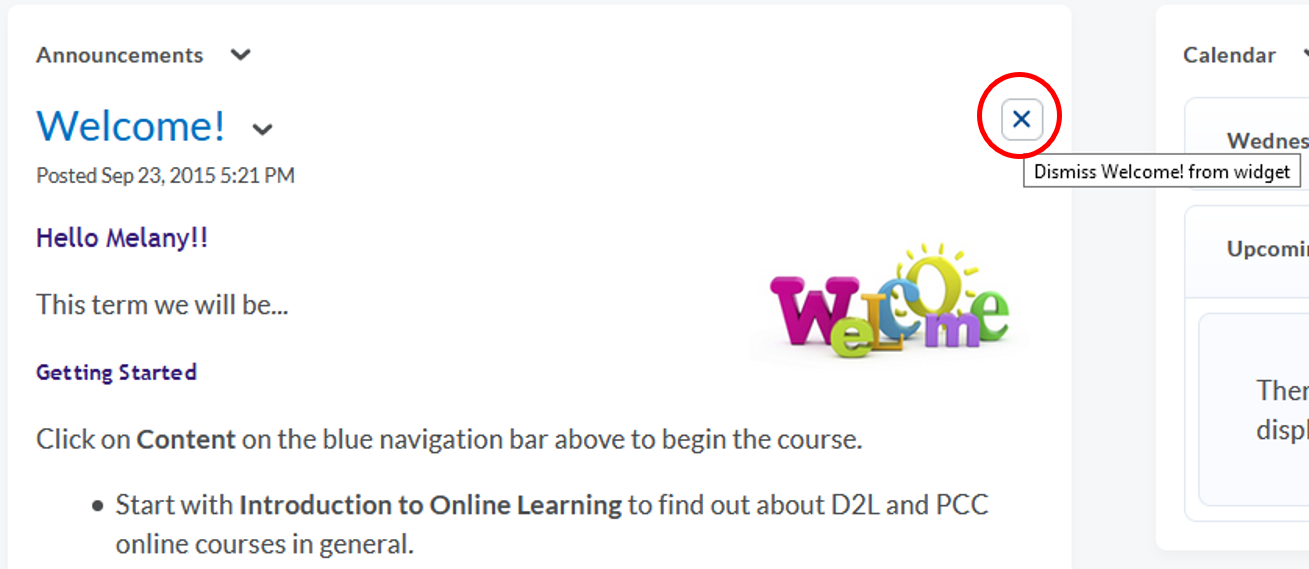
- The announcement you dismissed will disappear from the Announcements area
Option 4b: Restore a dismissed announcement
- Click on the Course Home link from the course navbar
- Click on the drop-down arrow for Announcements and select Go to Announcements Tool
- Find the dismissed announcement that you want to restore. You will see “(dismissed)” note next to the announcement’s title
- Click on the drop-down next to the announcement’s title and select Restore
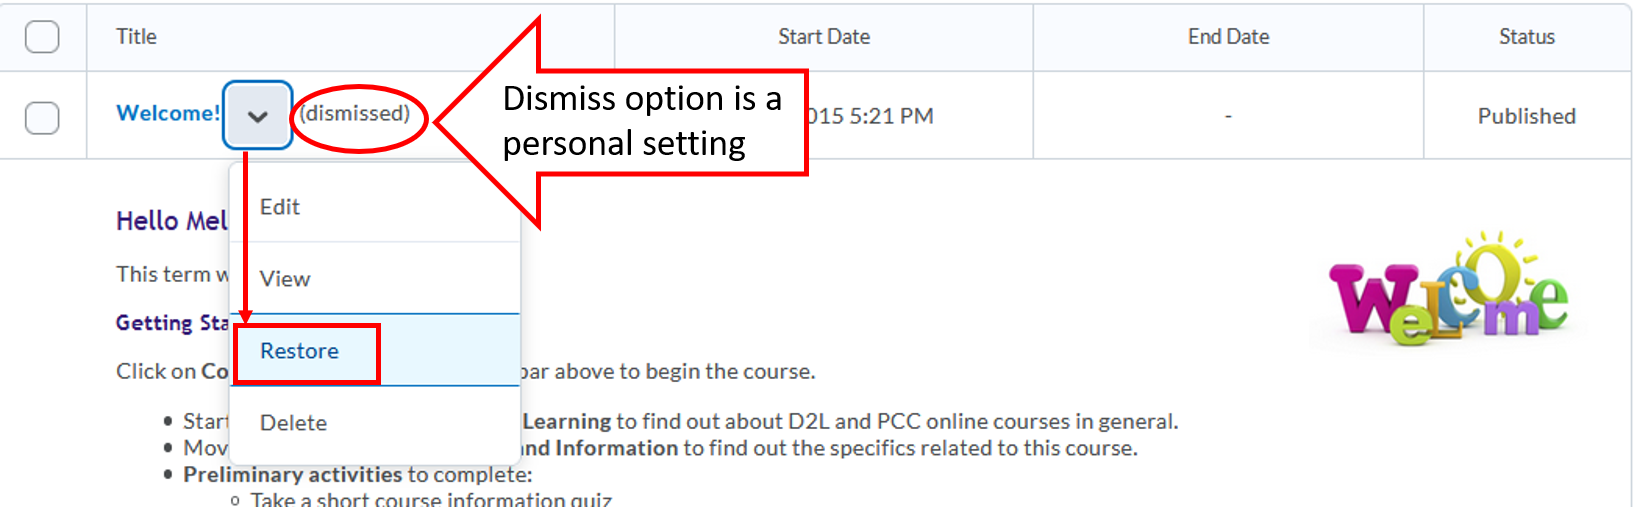
- You will see a pop-up message “Restored Successfully” at the bottom of the page
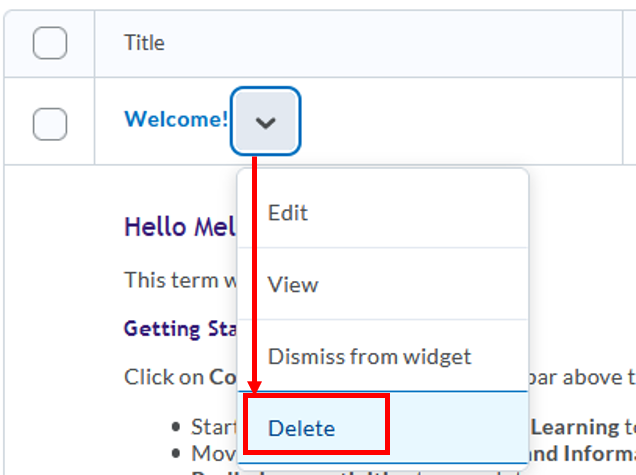
Option 5: Delete an announcement & restore deleted announcement
Video tutorial:
Option 5a: Delete an announcement
- Click on the Course Home link from the course navbar
- Find the announcement:
- If you see the announcement that you want to update available on the page, click on the drop-down arrow next to the announcement’s title and select Delete.
- If you don’t see it listed on the Course Homepage, click on the drop-down arrow next to the Announcements and select Go to Announcements Tool. Once you find the announcement you want to update, click on the drop-down arrow next to the announcement’s title and choose Delete.
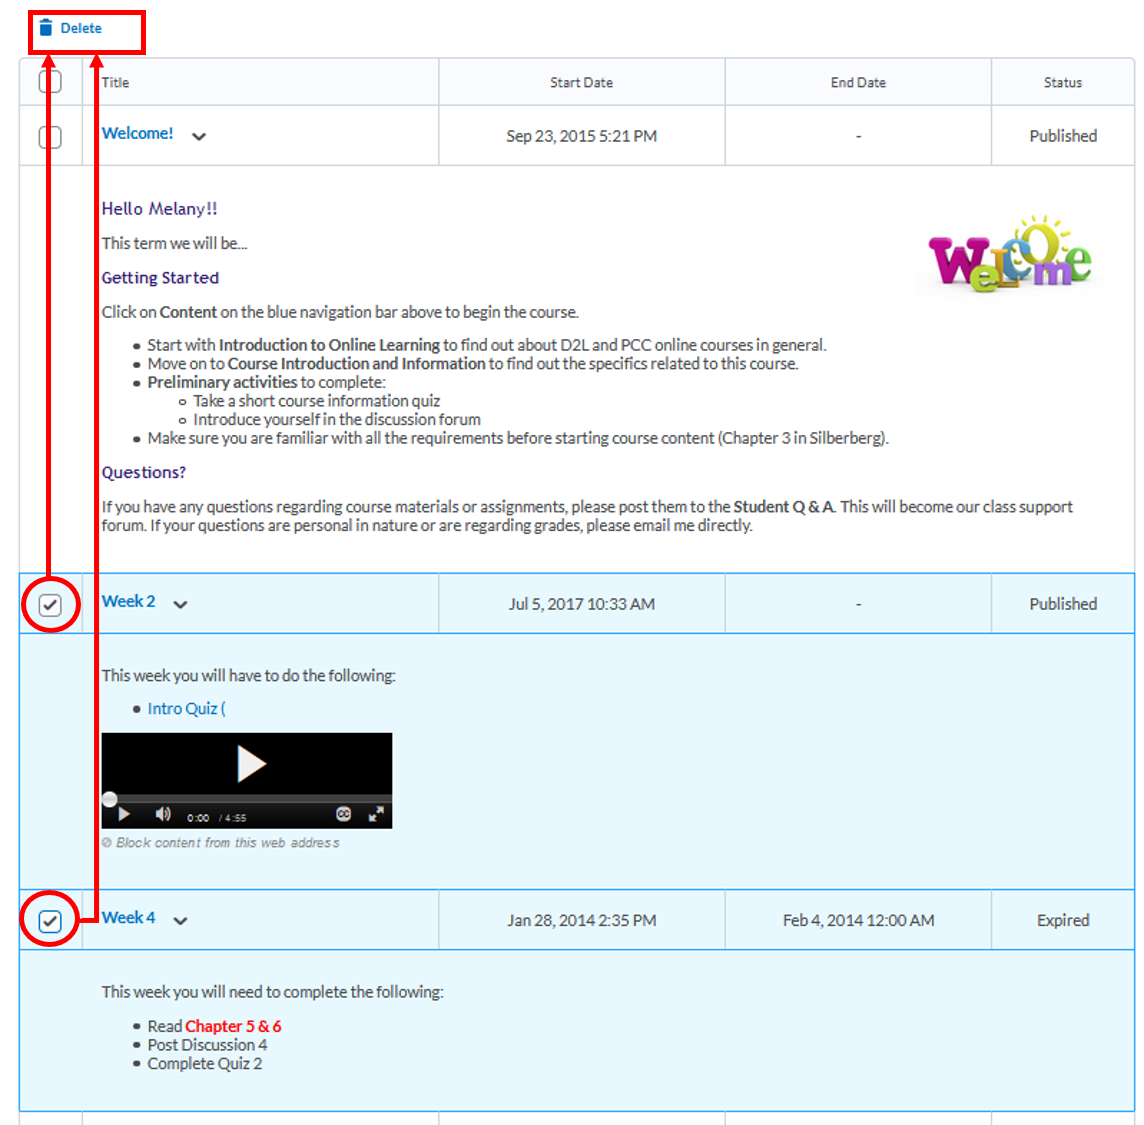
- To delete multiple postings, check the box next to the announcements’ titles you want to delete, then click on the Delete icon (trash) at the top of the list
- Click the Yes button on the confirmation window. You will see a pop-up “Deleted Successfully” at the bottom of the page
Option 5b: Restore a deleted announcement
- Click on the Course Home link from the course navbar
- Click on the drop-down arrow for Announcements and select Go to Announcements Tool
- Click on the More Actions button and select Restore
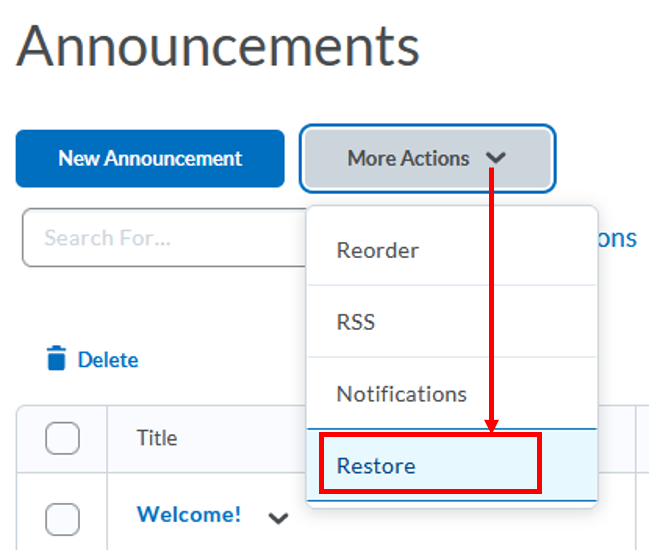
- Check the box next to the announcements you’d like to restore
- Click on the Restore button
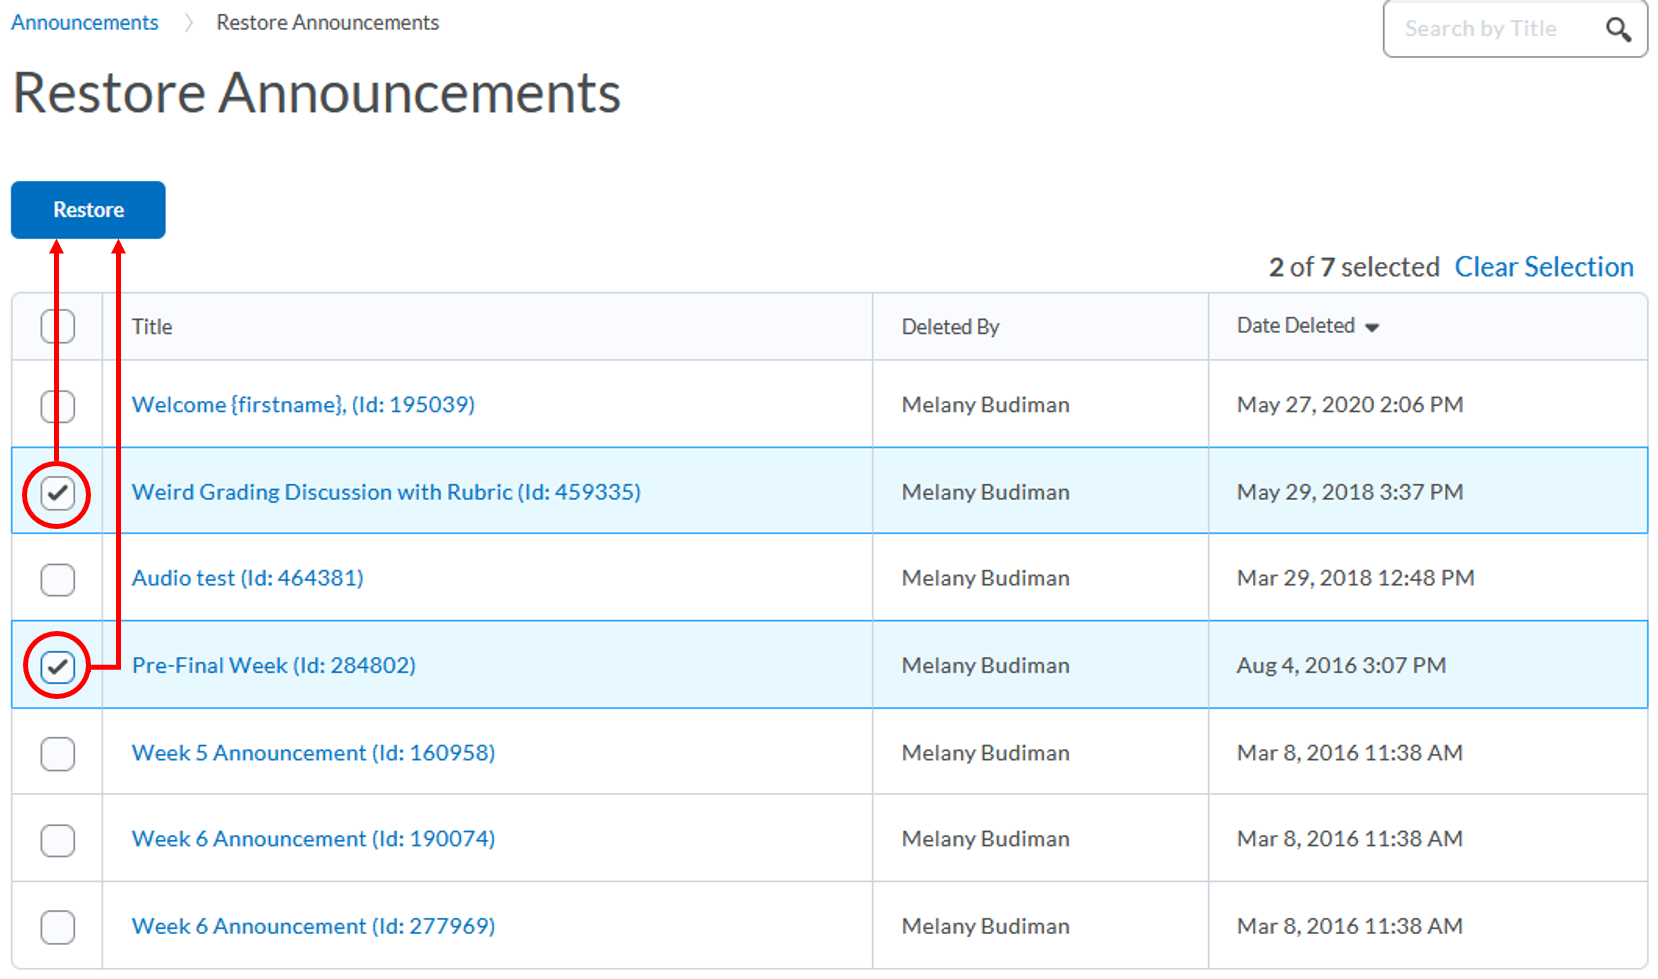
- You will see a pop-up “Announcements Restored Successfully” at the bottom of the page
Option 6: Copy an Announcement Using “Copy to Other Courses” from the Action Menu
After selecting Announcements from the navbar’s Course Menu, find the announcement you want to copy, click on the downward-facing caret to the right of its name, and do the following:
- Select “Copy to Other Courses” from the action menu and search for courses from the Choose Destinations box.
- Choose the destination course(s). In the Copy to Other Courses dialog box, a list of your available courses will appear. Check the box next to the course(s) where you want to copy the announcement. (And to refine your search by semester, select Search by Semester in the right-hand corner.) Review your selected course(s) to ensure accuracy.
- Select Next. You can also click on “Publish Announcement on Copy,” if this suits your workflow.

- On the next screen, click Copy Announcement and Done after you see “Copy Complete.”
- Verify the Announcement in the Target Course(s). Navigate to the course shell(s) where you copied the announcement, go to the “Announcements” tool to confirm the announcement has been successfully copied, and edit the announcement in the new course if necessary (e.g., update start and end dates, links, or course-specific details).
How and where can students see the Announcements?
Option 1: Sign up for Announcements notifications
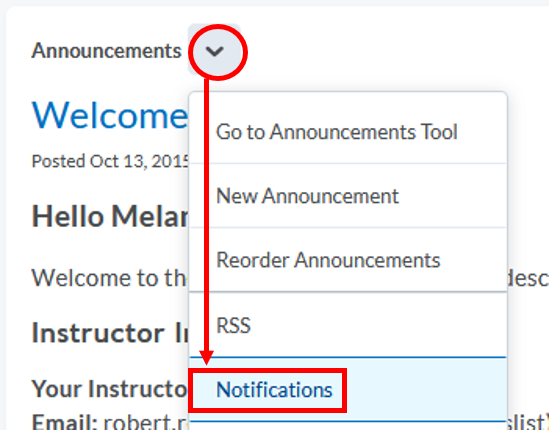
- Click on the Course Home link from the course navbar
- Click on the drop-down arrow for Announcements and select Notifications
- Under Instant Notifications section, check the boxes for both Announcements – announcement updated and Announcements – new announcement available
Note: check the boxes for SMS if you register your mobile phone number at the top to receive messages from the phone
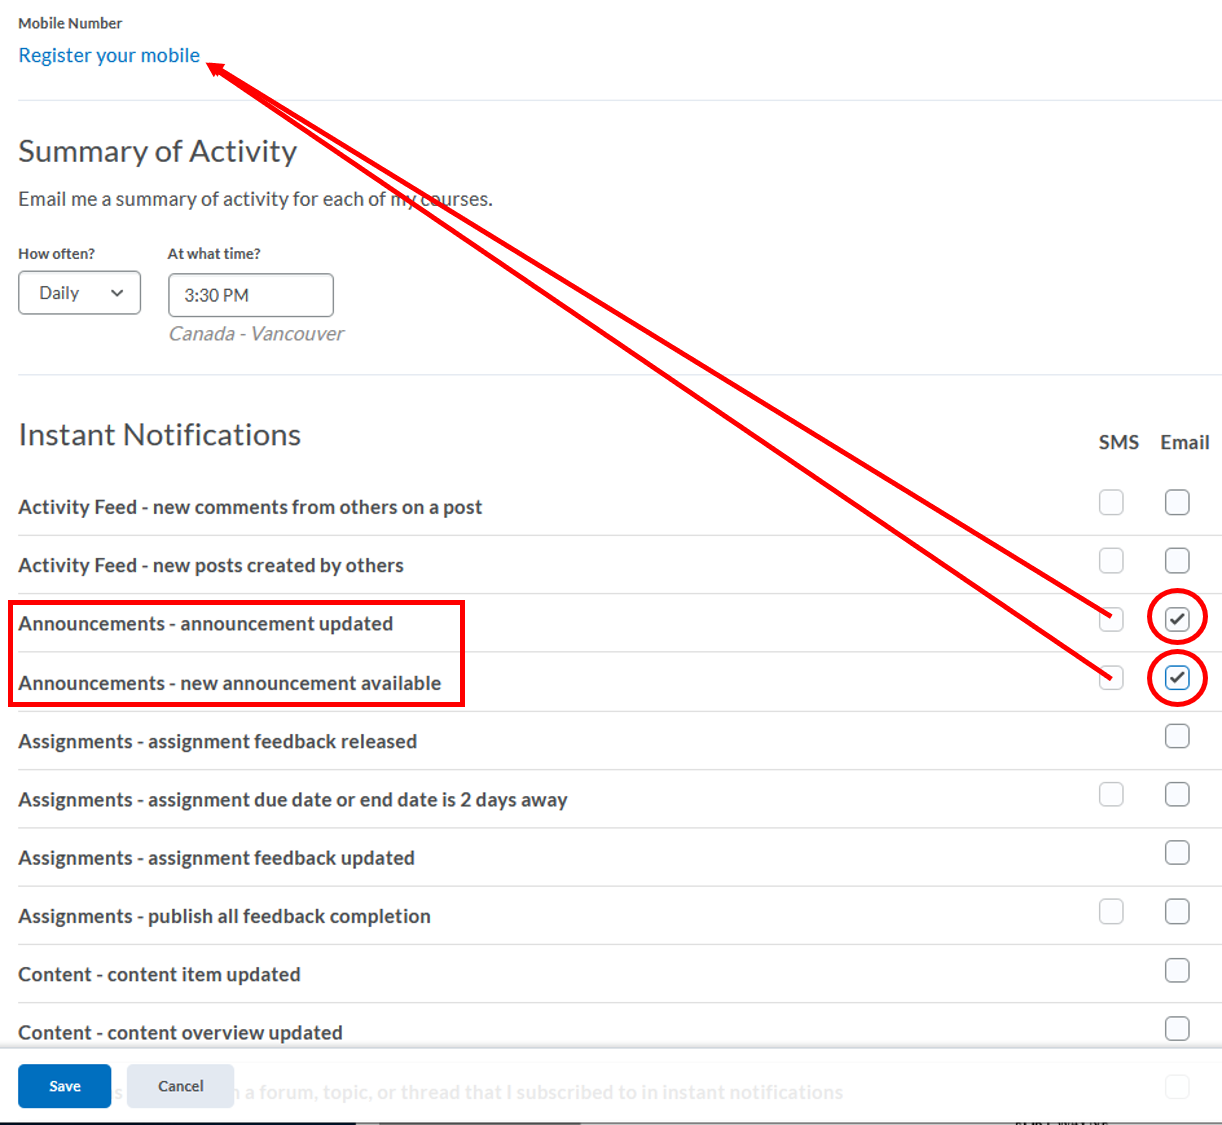
- Click on the Save button
Video Tutorial:
Option 2: Course Update Alerts
- When there are new updates for the courses that are active and you have access to, you will see an update alert show up on the top right corner next to your name, indicated by an orange dot on the bell icon

- Click on the new update alerts icon to display what new updates are available for your courses
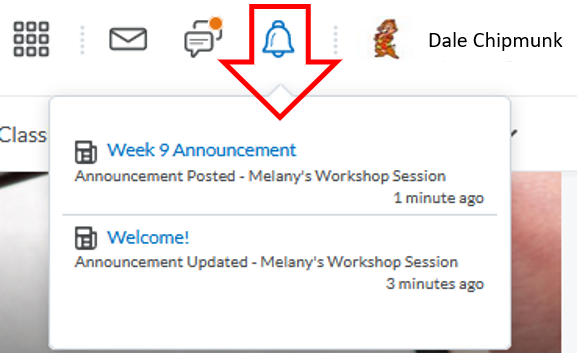
- Click on each update item, and it will take you right to it
Updated 06/10/2026