Managing modules and topics in content
You can manage (re-name, re-order, delete, hide, or add dates) your modules and topics in the Content area.
- What is required: A D2L Brightspace course in which you would like to manage your module and content items.
Managing Modules and Topics in the Content
You can rename, re-order or move, delete, hide, or add dates to your modules and topics. Choose one of the options below and follow the instructions
Option 1: Re-name a module or a topic
We’re showing you below the easiest ways to re-name a topic. Other methods you can use but not shown here are by using the Bulk Edit button or Edit Properties In-place from the topic’s Action menu.
Option 1a: Re-name a module
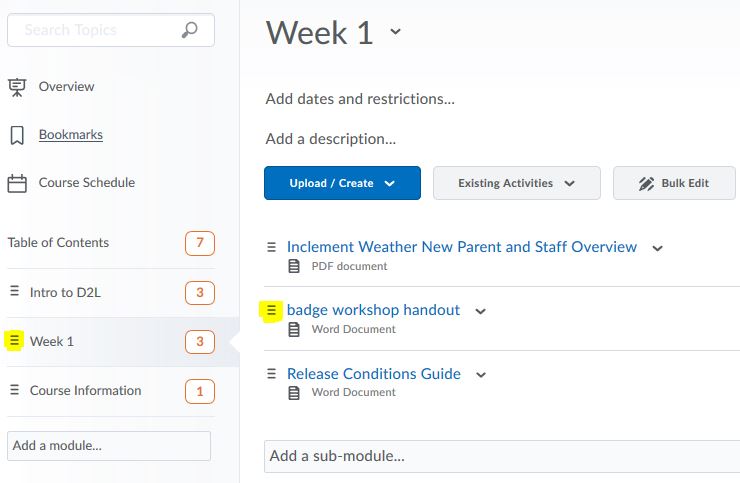
- Click Content from the Navigation
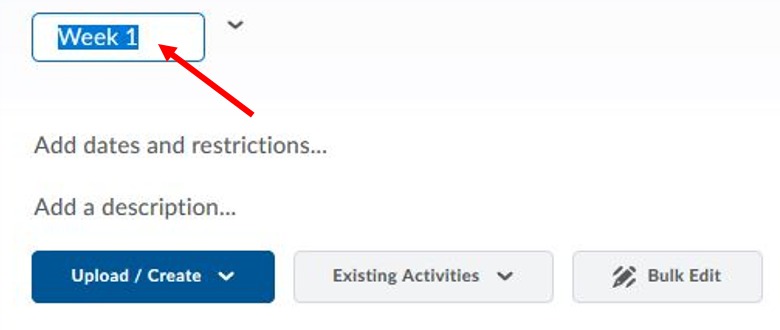
- In the Table of Contents panel, click on the module’s name
- Click on the module’s name so it becomes editable, type the new name and press Enter
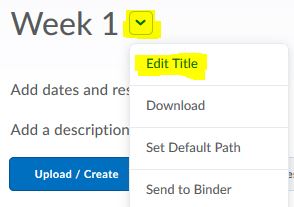
or Click on the Action menu next to the module’s name and select Edit Title, type the new name and press Enter.
Option 1b: Re-name a topic
- Click Content from the Navigation
- In the Table of Contents panel, click on the module’s name
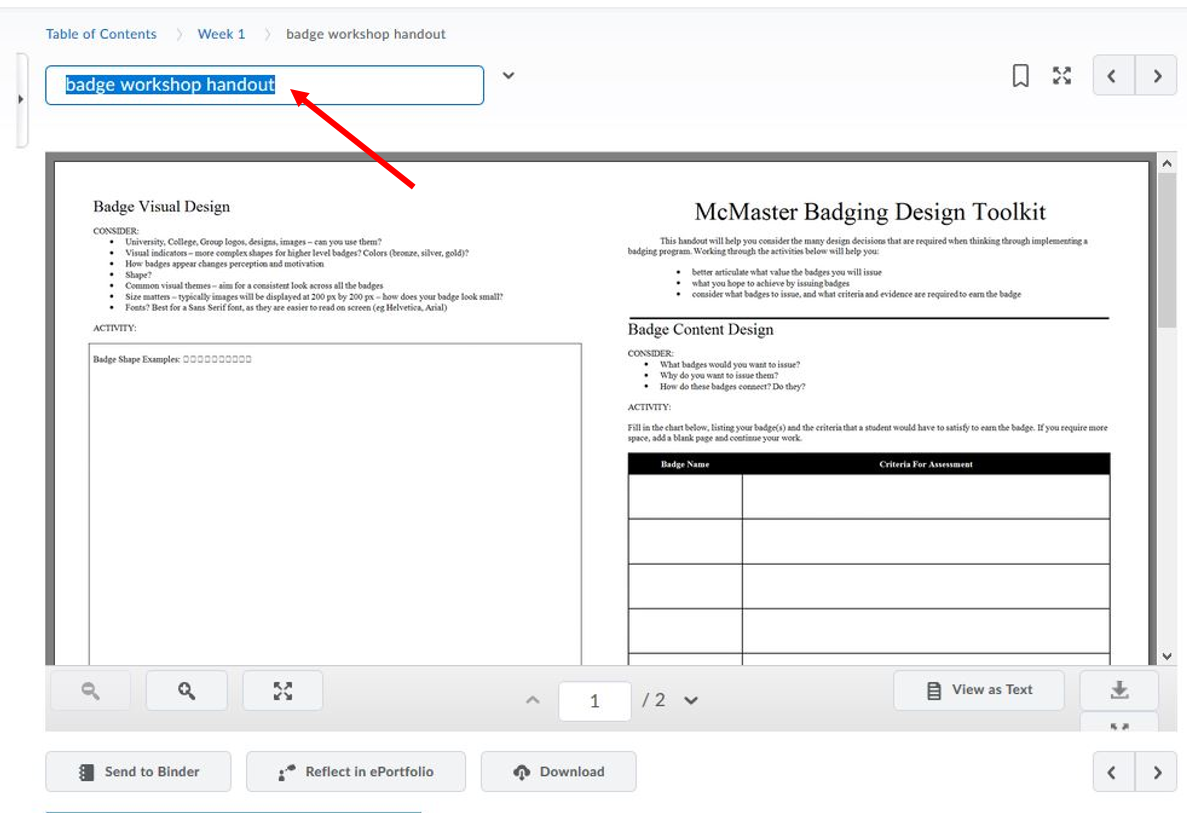
- Click on the topic’s name to view it
- Click on the topic’s name so it becomes editable, type the new name and press Enter.
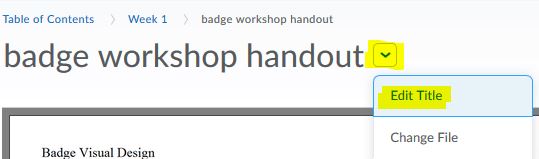
or Click on the Action menu next to the topic’s name and select Edit Title, type the new name and press Enter.
Option 2: Re-order or Move a module or a topic
Option 2a: Using the drag handle
In the Content tool, you can arrange your course content by dragging and dropping modules and topics using the module or topic’s drag handle (![]() ).
).
If you drag a module or topic above or below other modules and topics, a gray line appears to indicate you can drop the module or topic there. If you drag a module or topic over another module, the module appears orange to indicate you can drop it there.
You can also automatically update your existing files by dragging the newest version of your file from your computer into the appropriate module.
Note: Internet Explorer 9 and older currently do not support dragging and dropping files from your desktop into Brightspace Learning Environment.
Video Tutorial:
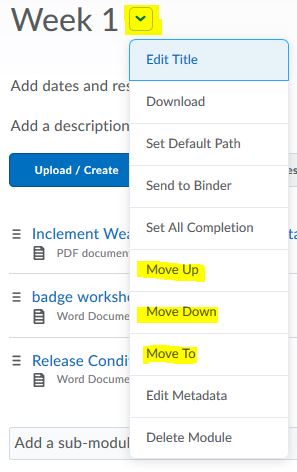
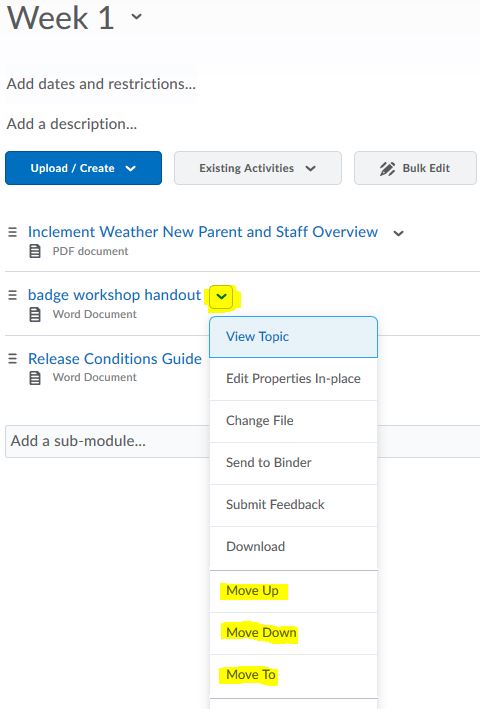
Option 2b: Using the Actions menu
If you are not comfortable using the drag and drop feature, you can use the action menu from within the Module or Topic.
- Click Content from the Navigation
- Click on the module’s name
- Click on the action menu from the module’s name or topic’s name and choose one of these options:
- Move Up
- Move Down
- Move To, will move the topic into another module or move the module into another module (this module will become the new submodule).
Reorder a module in the Content
Reorder a topic inside the module
Option 3: Delete a module or a topic
- Click Content from the Navigation
- Click on the module’s name
- Click on the action menu from the module’s name or topic’s name and choose Delete Module or Delete Topic. Deleting the module will delete all the topic items inside the module
- Choose from one of the options:
- Remove the topic from Content…, if the files are originally uploaded into the course, it will only remove the topic from the Content area, but the files will still exist in Manage Files. Links to any activity (Assignment, Discussion, Quiz, etc.) inside Brightspace will only remove the link but the activity will still be available
- Permanently delete…, will completely and permanently remove the module or topic from your D2L Brightspace course
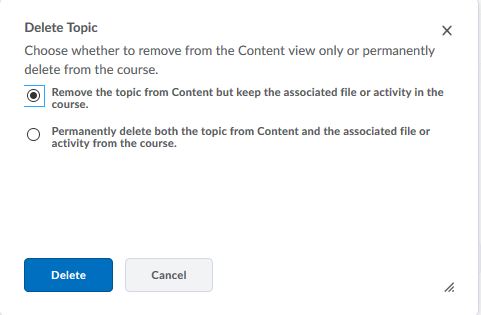
- Click the Delete button.
Video Tutorial:
Option 4: Hide a module or a topic
- Click Content from the Navigation
- Click on the module’s name or the topic’s name
- Click on the action menu from the module’s name or topic’s name and choose Hide from Users OR Select the visibility icon for the module (toggle for the topic only visible if you use Bulk Edit. If you do, click the Done Editing button to save changes). A visibility toggle appears to allow you to change between Visible and Hidden.
Option 5: Add or Remove dates to a module or a topic
Set date restrictions for deadlines and availability for items in Content, such as when students can access materials. If you set a start, end, or due date for a topic or module, it will appear on the Upcoming Events page and the Agenda view in the Calendar tool. Normally you only use start or due date. If you use end date for a module or a topic, your students will not be able to access it anymore.
There are 3 types of dates: Start Dates, Due Dates, and End Dates.
- Start Dates modify when a student can view or access content in a module or topic. Students will see that a module or topic exists, but they cannot access it if the Start Date has not yet occurred.
- Due Dates specify when a student should complete materials in a module. The dates will appear in the course Calendar and students will be able to see and access materials with a Due Date after the date has passed.
- End Dates restrict access to modules, topics, or items. They remove all access once the date has passed. (End Dates are not often recommended for Content modules or topics, as they affect the entire class access to course materials.)
Note: Adding a due date to a content item that is associated to an assignment overrides an existing end date that is further in the future. The due date also overrides the end date in the Calendar tool.
Option 5a: Adding dates
- Click Content from the Navigation
- On the Table of Contents on the left, click Bulk Edit
- For any topic or module that you want to add availability or due dates to, click Add dates and restrictions…
- Do any of the following:
- To add a start date, click Add start date. Enter your start date details using the calendar and drop-down selectors, or by entering text
- To add a due date, click Add due date. Enter your due date details
- To add an end date, click Add end date. Enter your end date details
- Click Update
- Click Done Editing.
Option 5b: Reset or Remove dates
To reset or remove a date and time set on either a module or a topic, simply select the date setting to expand the date options. From the date options, either select a new date restriction, or select X to the right of the date and time options to remove the date setting completely. Select the Update button to apply changes.