Manage Dates
The Manage Dates tool can help you to adjust most of the dates in your course in one place. Start, End, and Due dates for Calendar items, Checklists, Content modules and topics, Discussions, Grades, Announcements, Quizzes, and Surveys presented here and can be edited individually or can be bulk edited, including the Locking dates for Discussions.
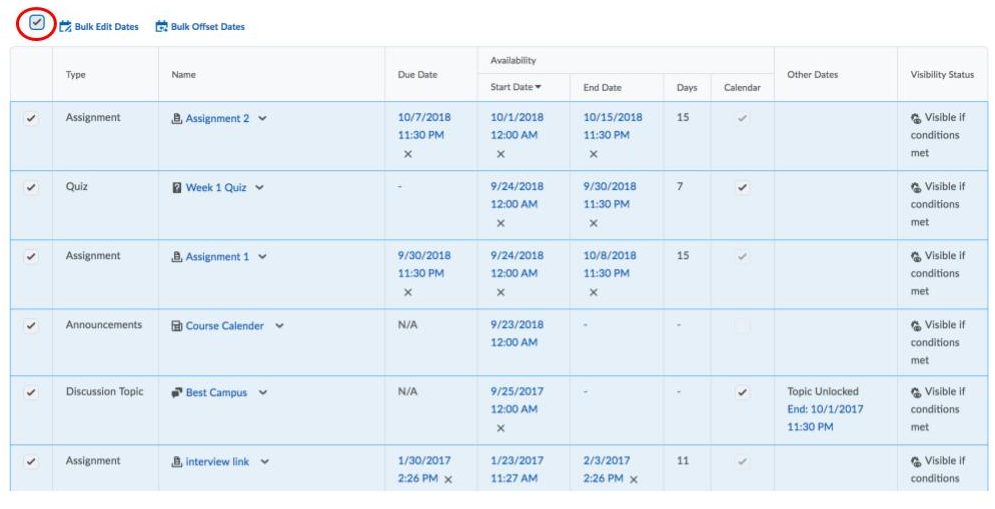
The Manage Dates tool also shows you if the activity is visible to students and if it is displayed in the calendar.
The Manage Date tool provides a method for quickly reviewing dates set in a course; the tool offers a sort-able table view, which can be filtered by tool type.
- What is required: A D2L Brightspace course with content. This tool cannot be used in an empty course.
Step 1: Finding Manage Dates tool in D2L course
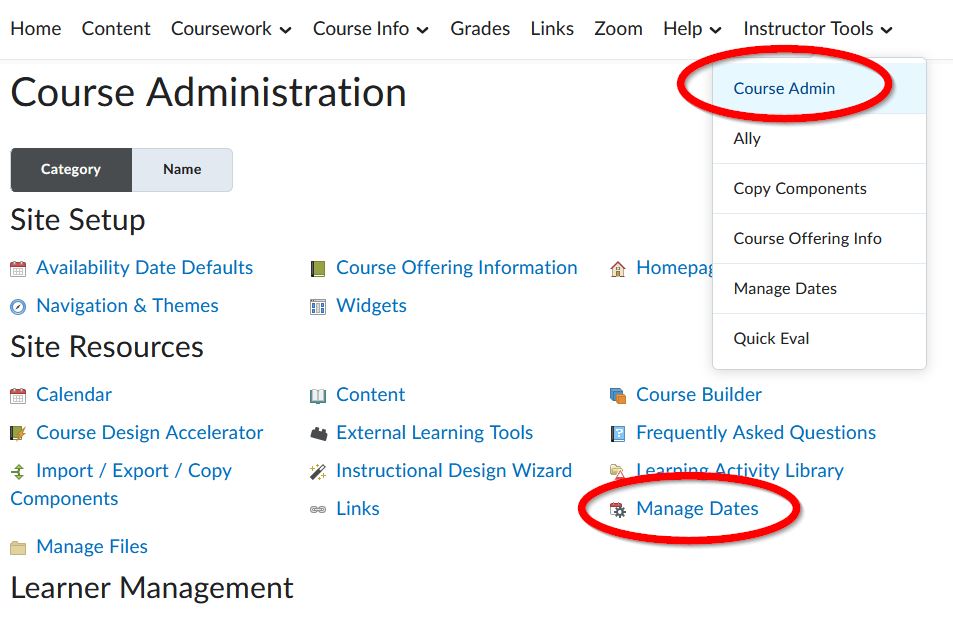
- Select Instructor Tools > Course Admin in the course navbar.
- Select Manage Dates, located under Site Resources section.
Step 2: Choose which tools to set dates
Option 2a: The default is All
You can leave the default to set all tools to change dates
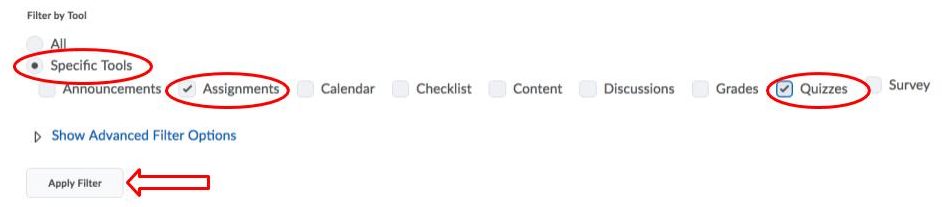
Option 2b: Using Filter by Tool to display options and sorting course items
You can narrow down your choices by using the Filter by Tool option. For example, if you have dates only associated with Quizzes and Assignments, select only those items under Specific Tools selection at top of the page. Click the Apply Filter button.
You can group the events on the top of the page by clicking on the Start Date or End Date columns names.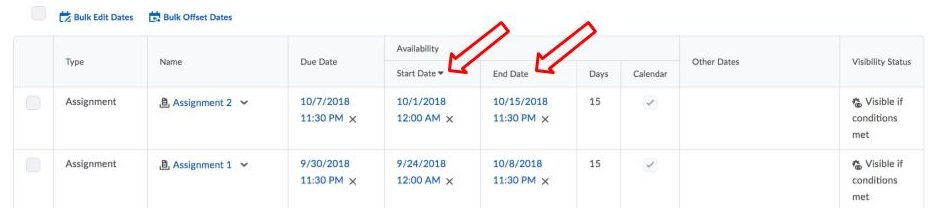
Step 3: Bulk offsetting dates in a course
- Select all the items (Content items, Discussions, Assignments, Quizzes, etc.) that have the dates associated with them.
- Click Bulk Offset Dates button and Bulk Offset Dates window will pop up.

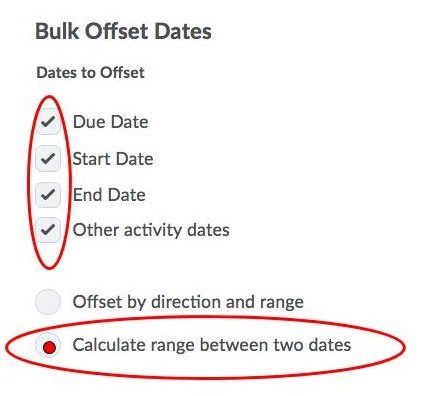
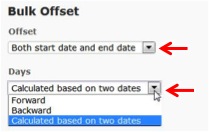
- Select the dates type that you need to offset, usually you want to select all the options available: Due Date, Start Date, End Date, and Other activity dates.
Then select Calculate range between two dates option. We find this option most useful.
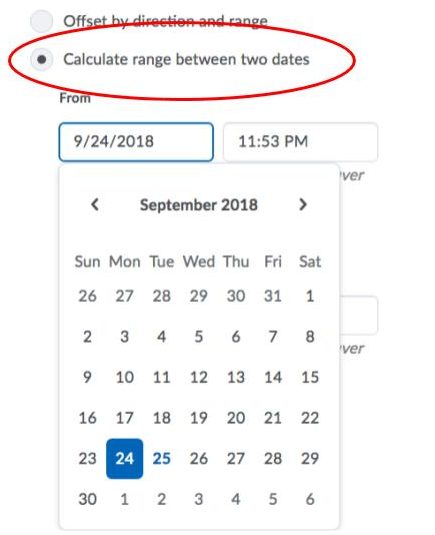
- Once you select Calculate range between two dates button the pop-up window will give calendar options to enter the desired two dates. These two dates have to be the dates of the same reoccurring once a term event. On this step, we want to be absolutely sure that we select the correct date. For example: you copy the course from Fall 2018 and wants to use it for Winter 2019
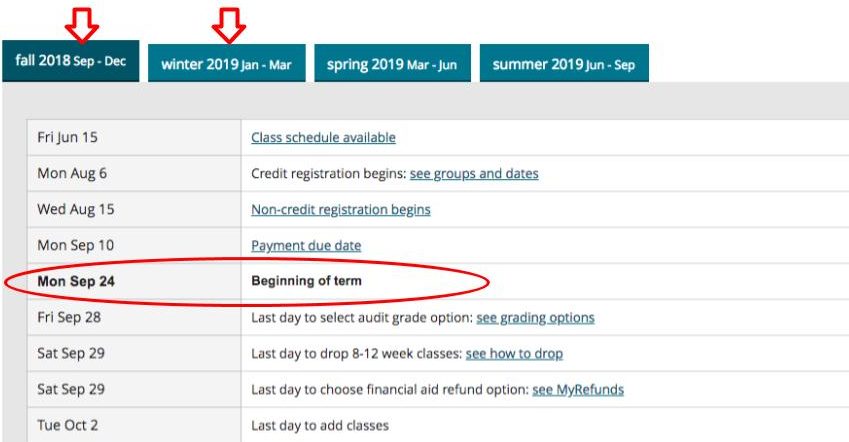
You can go to the Academic Calendar to find the correct dates to calculate.
The course that I am copying is from Fall 2018, so Beginning of term is clearly marked on 09/24/2019 as the starting date from Fall 2018
- Let’s get back to the D2L course and select the start day of the previous term in the From select box (e.g. 09/24/2018). Select a start day of the new term in the To box. In this example, you will put 01/07/2019 as the starting date for Winter 2019 course in the To field. Once you enter the dates, the window will display the exact number of dates to complete the offset.
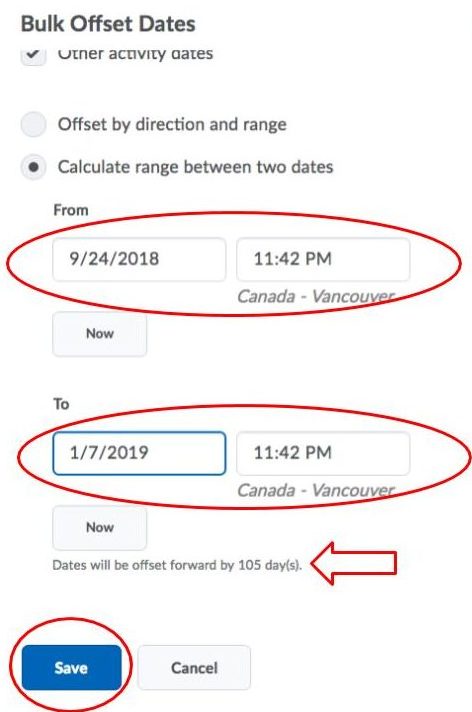
- Click on the Save button and let D2L Brightspace process your request. Check and verify that all dates have been updated.
Note: Quiz submission views dates won’t be updated. You will have to go to the Quizzes and edit the Quiz settings, then click on Submission Views tab to make the changes. Don’t forget to Save!
You have to be very careful, when you are changing all the dates at once, because, if you do make a mistake by offsetting the dates for the wrong amount of days, it might create even more work fixing it, rather than change each date for the single items and that is another option to edit your dates in Manage Dates tool.
Editing dates for a single Item (optional)
If you just want to change the date for a specific item,
- Select Course Admin in the course navbar.
- Select Manage Dates, located under Site Resources section.
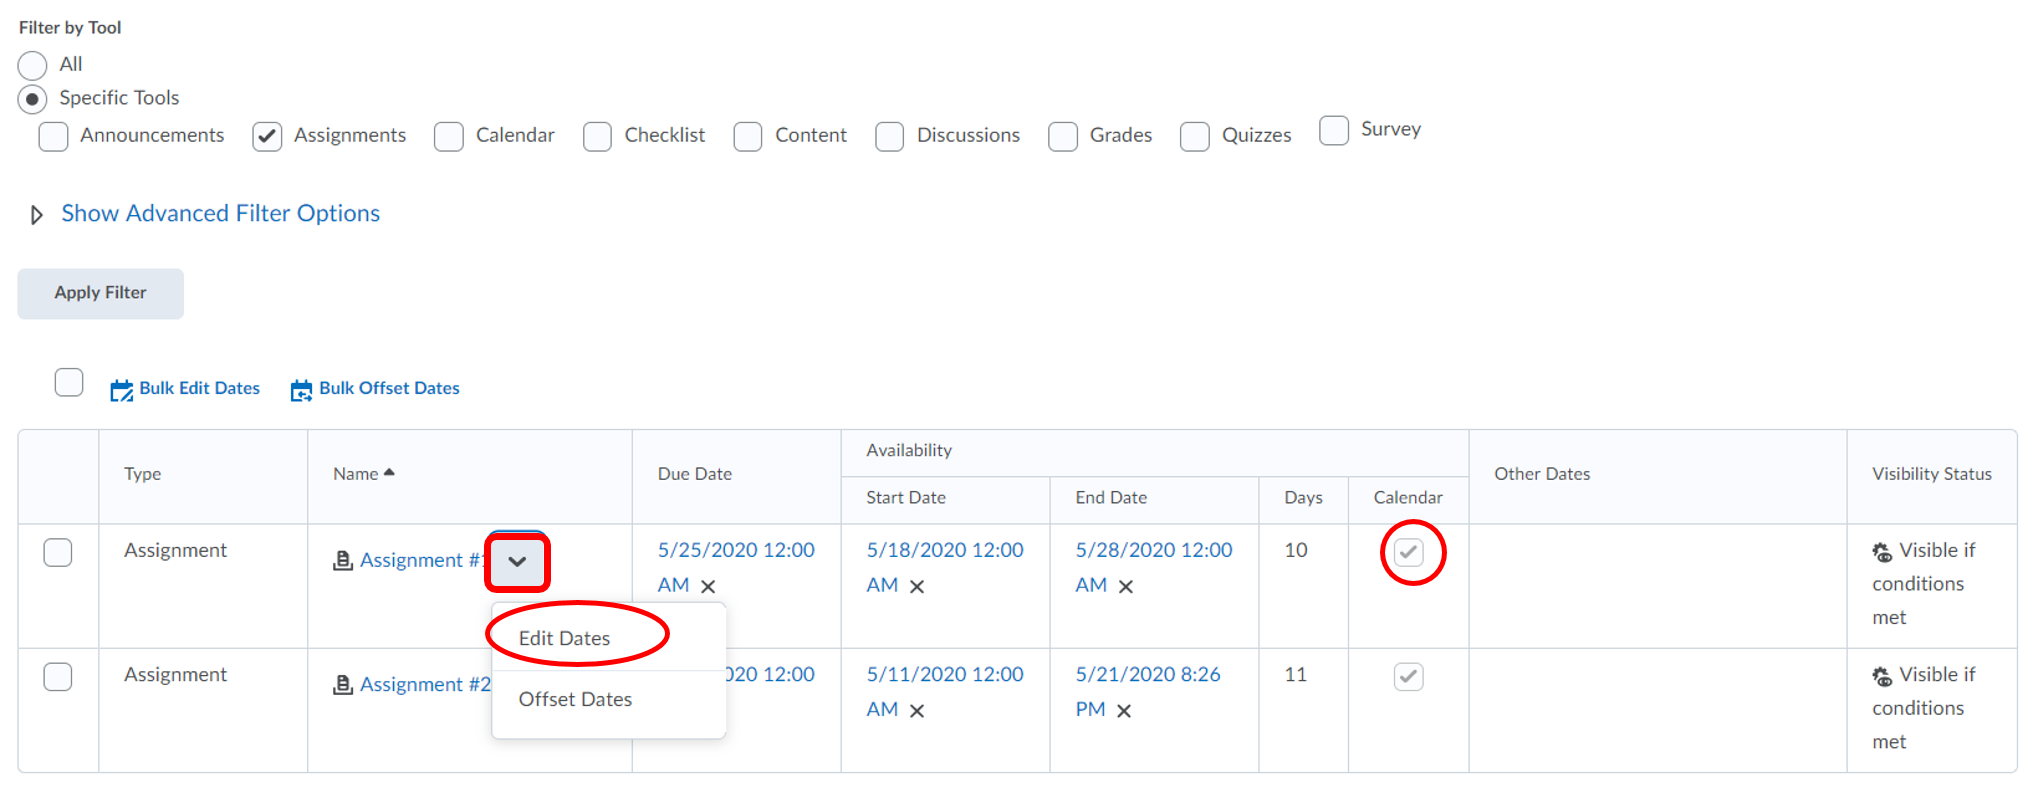
- Locate the item to change the date in the Manage Dates tool’s table and select the drop down arrow next to the item’s name.
- Select Edit Dates and the Edit Dates window will open.
- Enter new dates and select Save.
- Select the checkbox for this item in the Calendar column to display the item dates in the Calendar.
Manage Dates suggestions
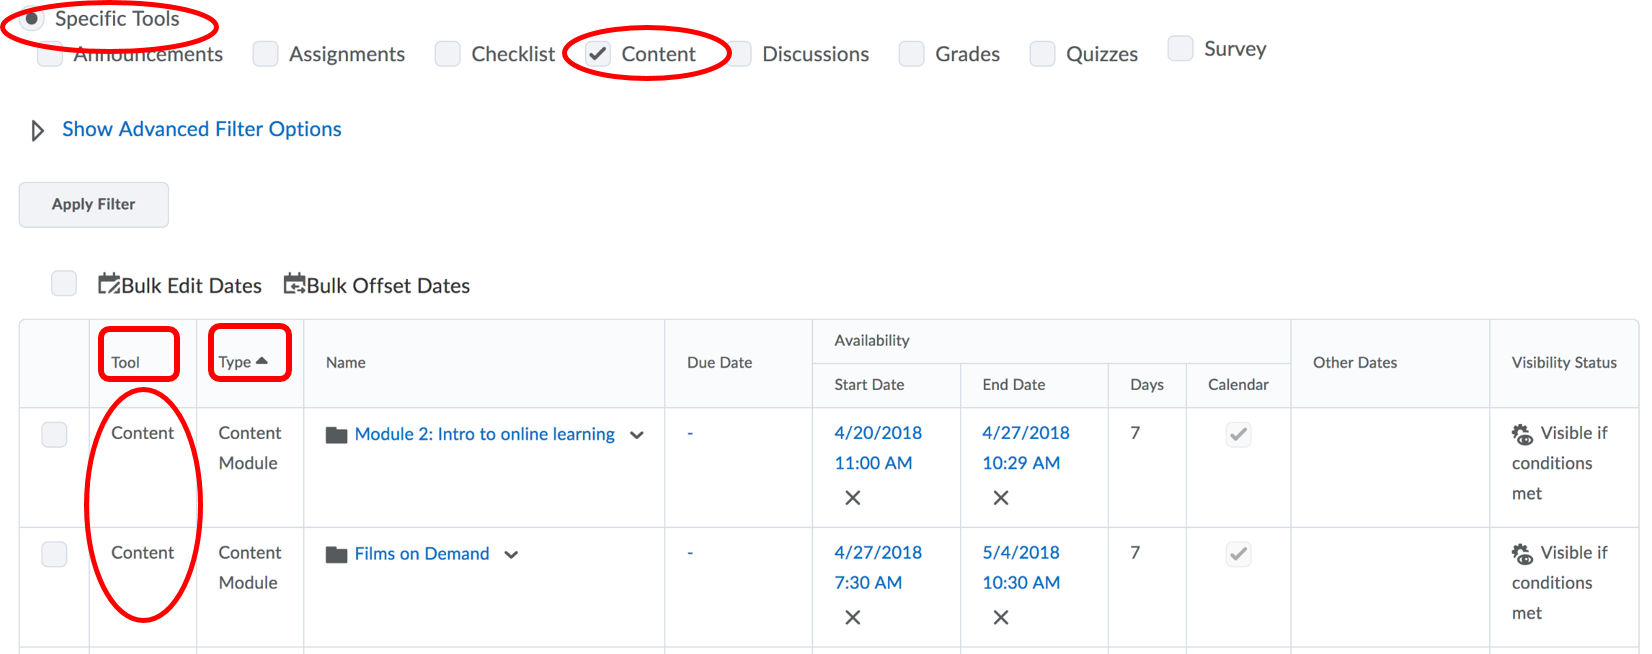
Content Modules vs Items
When you are setting dates for Content, try just setting dates on the module itself, not on every content item in the module. This helps simplify management of the dates, and based on the volume of calls we receive about it, setting dates on individual content items tends to create access issues for students later. It also makes managing dates easier in the future if you’re only changing the dates at the module level instead of individual files.
In Manage Dates, you can filter by Tool and select Content, then sort the results by Type to see just the modules. Then you can manage the dates for the modules rather easily.
Calendar options
If you make the dates available in the Calendar, students will be able to see the dates on the Calendar widget located on the Homepage of the course and in the Pulse mobile app or in their own calendar if they sync with their Google Calendar.