Adding modules and topics to content
You can add and organize your course materials in the Content area so that it is clear to your students what they need to do each week. You must create a module before you can add topics (content items). A module is a folder where you organize your content items by week or category. Once you create modules, populate them with topics (link to your files or link to one of the D2L activities). You can drag and drop files from your computer into a module or select from the Content tool’s buttons to create new topics or add existing course objects.
- What is required: A D2L Brightspace course in which you would like to organize your content files into modules
Step 1: Create a module
- Click on Content from the Course Navigation.
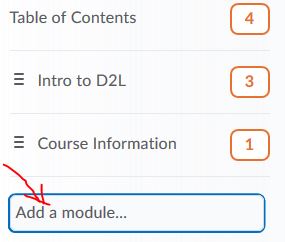
- In the Table of Contents panel, in the Add a module field, enter the name of your new module (e.g., Week 1) and press Enter.
To add a submodule, click on the module name. Then, in the Add a sub-module field, enter the name of your new sub-module and press Enter.
Note: You don’t really need to create a submodule if you only have 1 or 2 things to put in it. Submodules are not accessible. Please use them sparingly.
Video Tutorial:
Step 2: Add a content item
- Click on Content from the Course Navigation.
- Click on the module’s name you want to add topics (content item)
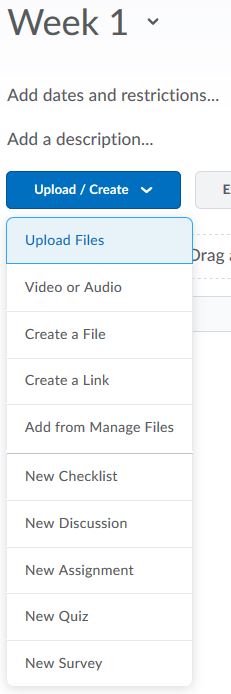
- To add content items, click the Upload/Create button and select one of the options from the list, or drag and drop content into the module.
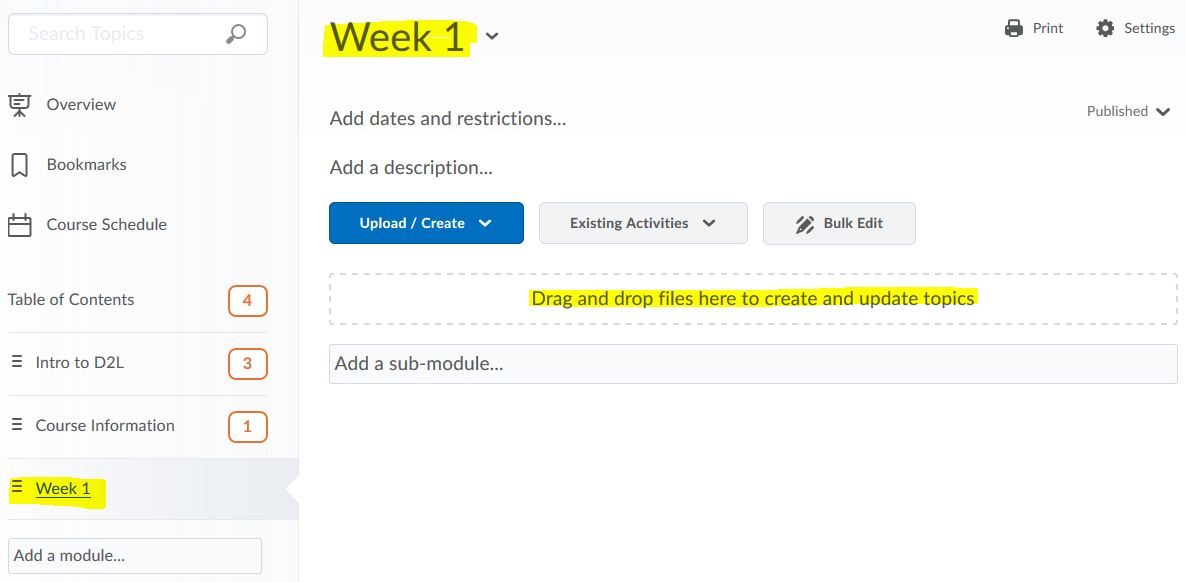
Add content topic using drag and drop
Add content topic using the Upload/Create button
Video Tutorial:
Most commonly used options:
- Upload files, choose My Computer and click the Upload button. Navigate to where you store your files, choose one or multiple files, and click the Add button.
- Create a File will create a new HTML file.
- Create a Link, enter the title (name) for the link and the URL address. If the link goes outside PCC, check the box to Open as External Resource, then click the Create button.
What kind of files can I use for course content?
Although there’s no restriction on what type of files you can have in the content, the following files are mostly used in the Content and will provide you with a preview of the content before saving it. Find a complete list of files you can use.
- Web document (html, htm)
- Word, PowerPoint, and PDF
- Images (jpg, gif, png)
Updated 11/14/2025