Using Kaltura Capture
Step 1: Installing Kaltura Capture
Please note that the minimum system requirements to set up the Kaltura Capture application are Windows 10 or later (64-bit) and macOS 13 or later. You can learn more about the system requirements on the Capture prerequisites and system requirements page.
The Kaltura Capture application needs to be downloaded and installed once. It will automatically launch after that if you save the default settings.
Download Kaltura Capture:
- Log in to your D2L Brightspace
- From My Home page, click MyMedia from the navigation bar
- If it is your first time, you will need to check the box and continue with the agreement statement
- Click Add New button and choose Capture. If it is your first time, you will need to choose what OS to download:
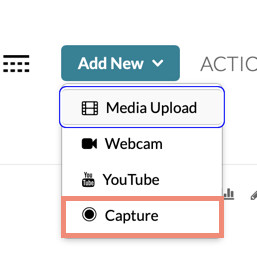
Add New button with the Capture option highlighted
Download for Windows or Download for Mac
Option 1: Installing for Windows
- Click Download for Windows to download the application.
- Double click on the msi file. The Kaltura Capture setup screen is displayed.
- Click Next on the welcome screen of the Setup Wizard. On the initializing setting screen, click Next.
- If you would like to change the location of your stored recordings, enter the new location in the Recordings folder field.
- Click Next to begin the installation, click Finish on the final screen to complete it. The Kaltura Capture desktop recorder software is now installed and ready to be used.
- Click My Media from the navigation inside D2L Brightspace. Click the Add New button again and choose Capture to start using it.
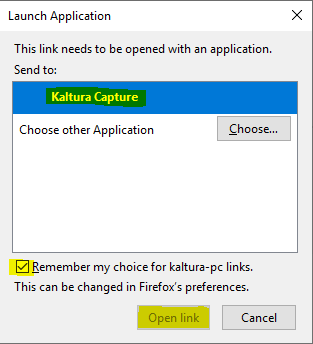
- Choose Kaltura Capture from the Launch Application window, check the box to remember your default, and click the Open link button.
Option 2: Installing for Mac
- Click Download for Mac to download the application.
- Double click on the DMG file to open.
- The window will appear. Drag the Kaltura Capture application icon to the Applications folder.
- Click My Media from the navigation inside Brightspace. Click the Add New button and choose Capture to launch Kaltura Capture.
Note: Some macOS security settings must be enabled to use Kaltura Capture. For more information, see Install Kaltura Capture for Mac.
Step 2: Setting up options
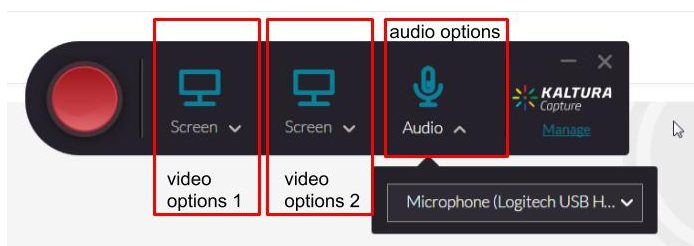
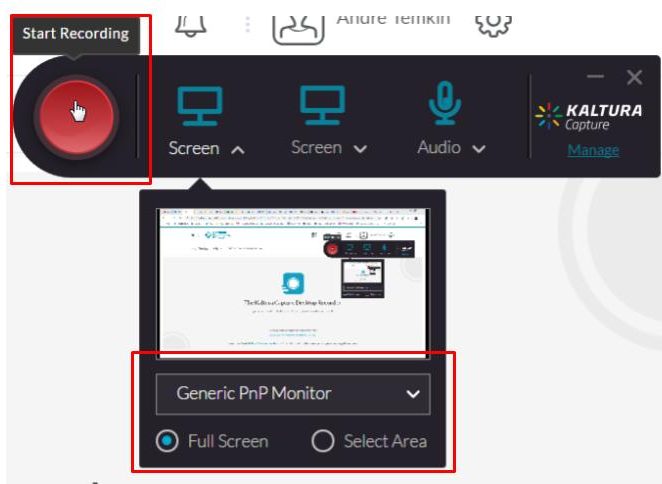
Once you launch Kaltura Capture, the Kaltura Capture recorder is displayed. The Kaltura Capture recording tool includes, recording button. Press the red button to start your recording screen and camera preview. Once you choose one of the options below, we recommend you to run a recording test to make sure everything is in order before you actually do your recording.
Tips for recording video
There are some options to configure settings for each one of them, including your audio. You can easily record any combination of screen and camera. Kaltura Capture provides several recording options:
Option 1: One screen recording
When choosing this option, the screen settings are set to the highest quality available by default. So you can just start recording.
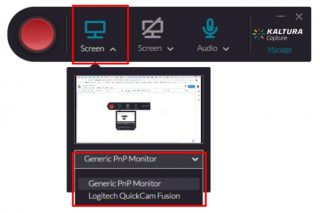
If you would like to change the screen or use two screens, click on the arrow next to the screen icon. You can see that the input default resource is the built in screen and the screen drop down menu includes a list of all connected screens. Select the screen you’re going to record from.
You will have options to choose the Full Screen recording or Select Area of the screen to record.
Option 2: Two screens recording
Once you’ve selected the first screen, click on the arrow next to the camera icon and choose the second screen from the drop-down menu. The screen icon will then display automatically instead of the camera icon.
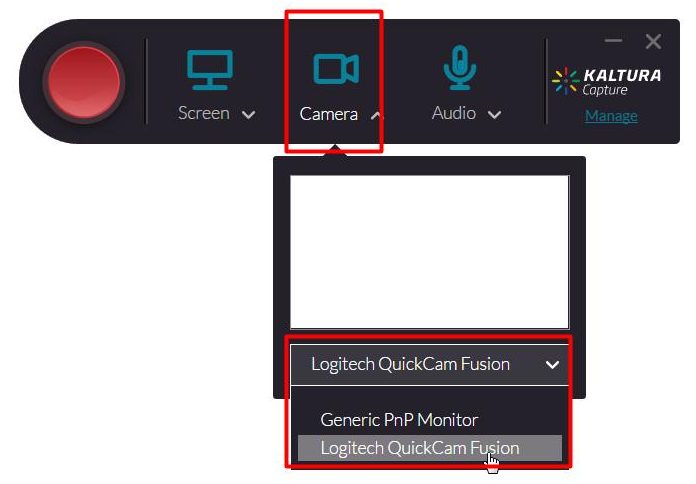
Option 3: Webcam recording
When choosing this option, the camera settings are set to the highest quality available by default. So you can just start recording.
If you’d like to change the camera input, click on the arrow next to the camera icon, select the webcam input source you’re going to record from the drop-down menu.
To record two cameras, after you’ve selected the first camera click on the arrow next to the screen icon and choose the second camera connected.
If you’d like to record from just one camera input, make sure to disable the second input.
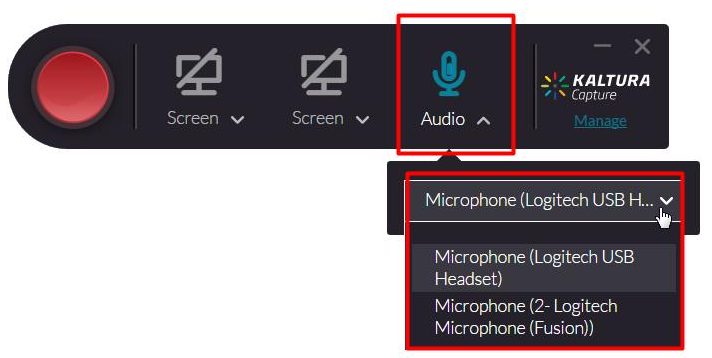
Option 4: Audio recording only
When choosing this option, note that the audio input default resource is your built in microphone. The fallback is USB or jack mics. Audio settings are set to the highest quality available by default, so you can just start recording.
If you’d like to change the audio input, click on the arrow next to the microphone icon, select the audio source you’re going to record from the drop-down menu.
If there’s more than one microphone connected, select the microphone you want to record from. Be sure to disable the other inputs if you’d like to capture audio only.
Option 5: Capture both the screen and webcam.
When choosing this option, both the camera and screen settings are set to the highest quality available by default. So you can just start recording.
If you’d like to change the camera or screen inputs, just follow the same steps as before and change the input source using the drop-down menu of each input.
Step 3: Options while Recording
Annotate recording
When recording you can scribe, doodle or annotate the screen recording using a variety of tools. Click on the Pencil icon to engage the annotation palette.
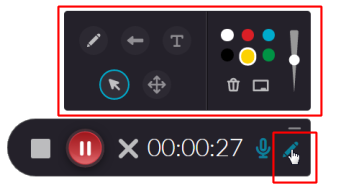
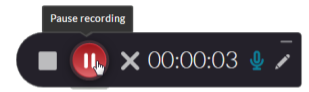
Pause recording
You can pause the recording by clicking on the red circle
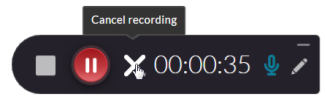
Cancel recording
By clicking on the gray X, you can cancel the recording. Note, that you will be prompt in with the confirmation box.
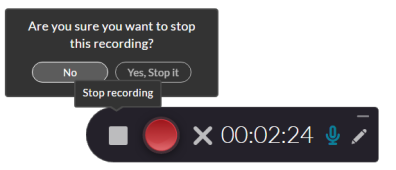
Stop recording
By clicking on the white square, you can stop the recording. You’ll be prompted with a confirmation box if you want to stop the recording or not. If yes, the recording will be completed.
Step 4: Finish Recording
- Click the white square button to stop the recording and choose Yes, stop it to confirm.
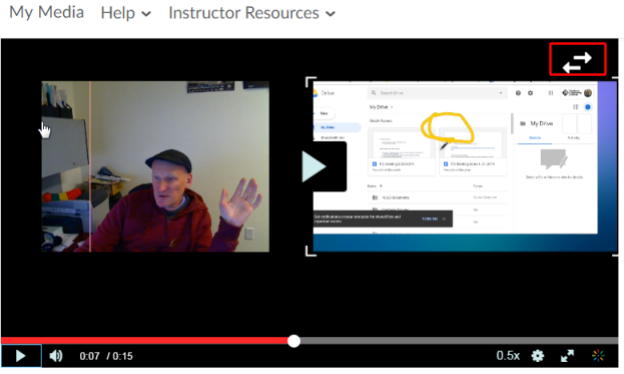
- You can preview the video by clicking the Play button (grey triangle) below the video preview.
- If you choose Option 5 on Step 2: Capturing both the screen and webcam, on the recording preview you can see the two streams: of the screen and the camera. You can also choose how you want to view them, picture in picture, side by side, or maybe focus on a specific stream.
- If you choose Option 5 on Step 2: Capturing both the screen and webcam, on the recording preview you can see the two streams: of the screen and the camera. You can also choose how you want to view them, picture in picture, side by side, or maybe focus on a specific stream.
- You can choose to Delete and start over with your recording.
- If you’re satisfied with your recording, enter the appropriate title for your video. Add tags using keyword, separate each word by pressing the Enter or Return key on your keyboard (i.e. your course, video topic, your name, etc.) so that your video can be easily search later.
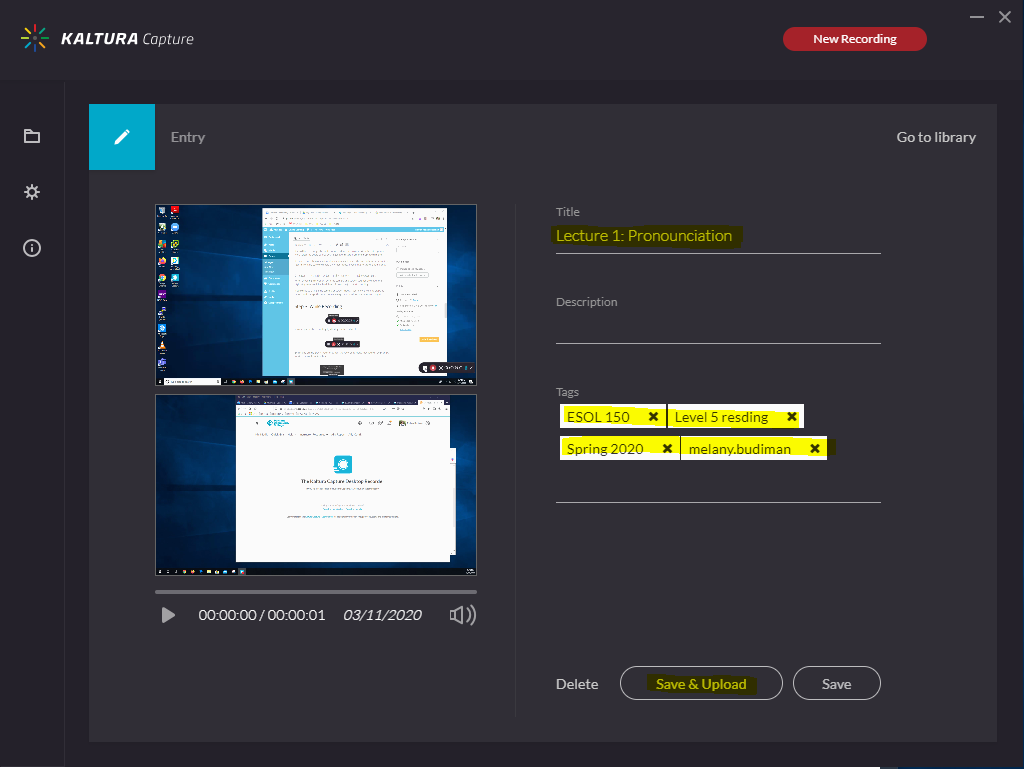
- Click the Save & Upload button. Your video will be uploaded to Kaltura streaming server. It will take time depending on video length and your internet connection.
- Click X on the top right corner to close the Kaltura Capture application.
Step 5: Exit Kaltura Capture
Even though previously you already closed Kaltura Capture application, it is still running on the background.
To completely exit the Kaltura Capture application, go to the Taskbar and Navigation Properties box. Right-click on the Kaltura Capture icon, select Quit to exit the application.

To hide or show Kaltura Capture, select show or hide. Note that hiding the application means that you are still logged in.
Step 6: Adding a video to your course
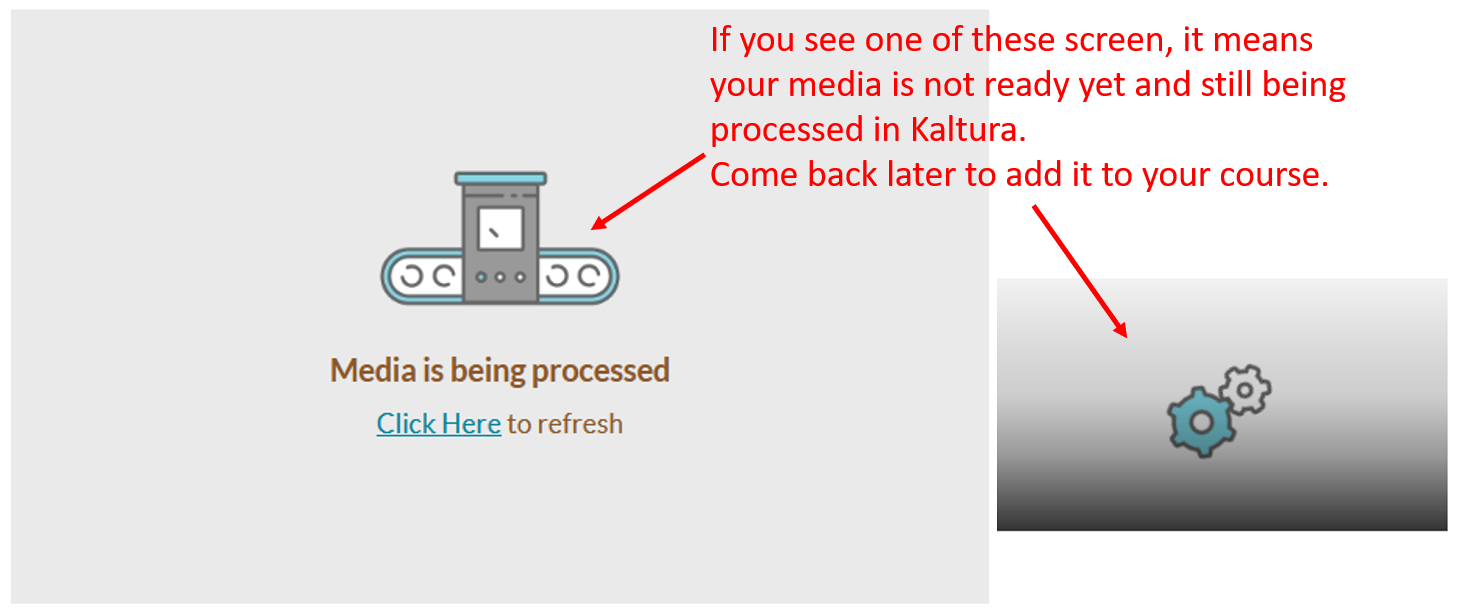
Your video recording may not be available right away. Depending on video length and your internet connection, your video may still being processed in Kaltura. Come back at a later time to check and follow the guide (Option 1 and 1a or Option 2 and 2b) to Embed from My Media using the Insert Stuff.
Updated 6/26/2026