Zoom – Student Host Guide
This guide describes how to use the Zoom web conferencing tool for student group work. Please note this guide is subject to change as more features are added to Zoom.
Before continuing
Check with your Instructor before following these steps. You do NOT need to follow these steps if you are only joining in to a room that your instructor is hosting. Look over the Zoom Student Participant Guide for instructions on how to access a Zoom meeting room you are not hosting.
Zoom software requirements
Portland Community College only supports the use of Zoom on a full Desktop or Laptop computer with a currently supported Operating System (Windows and Mac).
Note: Mobile devices, Chromebooks, Tablets (e.g. Amazon Fire / iPad / Android), as well as computer running Linux-based operating systems are NOT supported by Portland Community College and may not have full functionality within Zoom.
Chrome OS / Chromebooks
If you are attempting to access or Host a Zoom session via a device that uses the Chrome OS (ex. Chromebook) then you can view the following Zoom support page on how you would do so:
Note: Cloud recording options may not be available for student accounts on a device using the Chrome OS. While you can still host a Zoom session on this device, you may have to set another user as a co-host or allow others to record. The person that does the local recording would then have to follow the steps below on how to add it to their Google Drive and share with other participants.
Terminology
Student Host: The student who will host and record a Zoom meeting room
How to host a meeting
Here’s an overview of the process:
- The Student Host needs to activate their Zoom account
- The Student Host will then start a meeting and share the meeting room URL with other participants
- If he room is supposed to be recorded and shared then the Student Host will do this via the record option listed within the Zoom Room
- If the room was recorded then the Student Host will need to upload any recorded files to their PCC Google Drive account and share the link with those who need access to it
Step 1: Activate and access your Zoom account
- Go to portlandcc.zoom.us
- Click the Sign In option
- Use your MyPCC credentials to sign in and create your Zoom account
Step 2: Accessing your personal meeting room in Zoom
- Follow the steps above to access your Zoom account
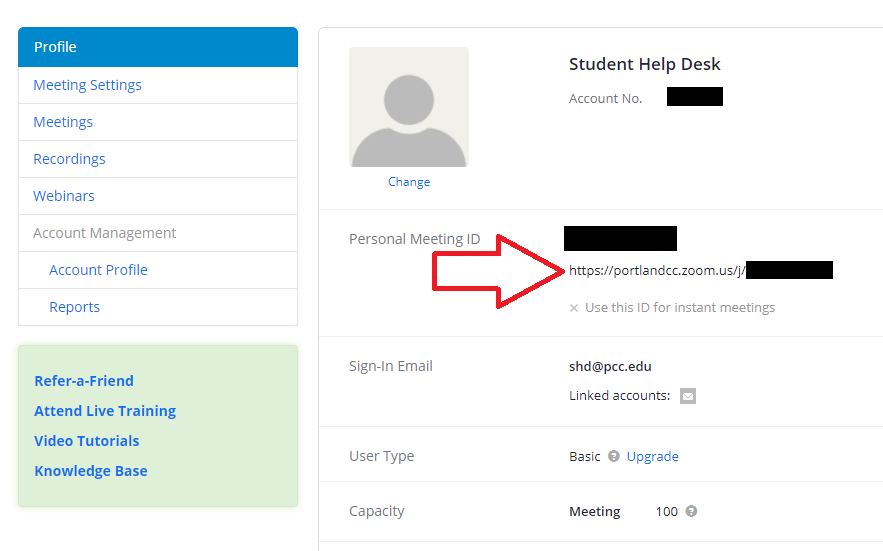
- Once logged in you will be set to your Profile page by default
- Look for the Personal Meeting ID to find your full Personal Meeting Room URL (shown in the screenshot below)
- Copy and use the Personal Meeting Room ID URL in your browser to access your Zoom Meeting Room
- Share the Personal Meeting Room ID URL with those who need access
Step 3: Using and recording a meeting room in Zoom
For an overview of how Zoom works please view the following pages:
- Zoom Student Participant Guide.
- Invite Others to your Meeting
- Managing unwanted participants
- How to share your screen
- Test and Configure Audio devices
- Test and Configure Video/Webcam
The Student Host will have the additional ability to Record their meeting room. They can do this by clicking the “Record” button within the Zoom toolbar along the bottom of the Room. 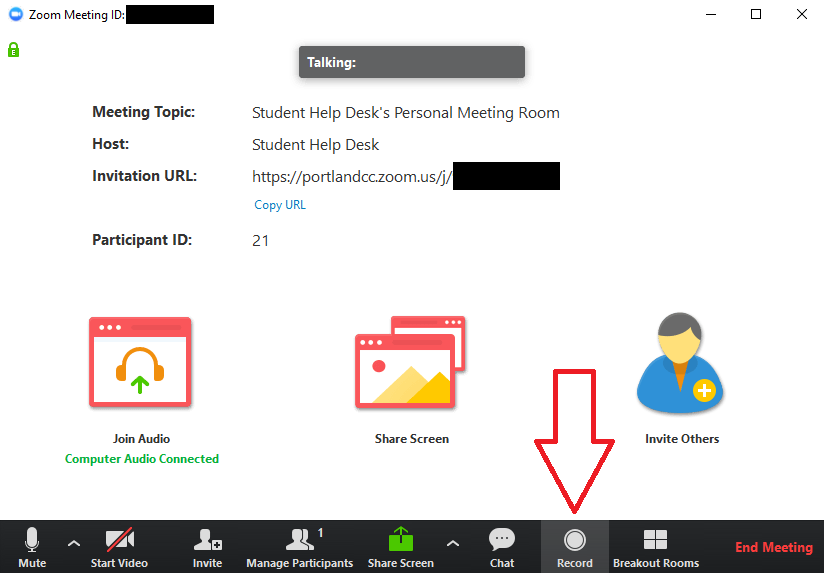 When the Student Host leaves the room using the Leave Meeting button in the Zoom toolbar then they will be prompted to choose a location on their computer where they want to save the recording files.
Note: By default Zoom will create and point to a folder within Documents/Zoom with the title of the Room that you recorded in. You can alternatively select a different area to save the recording if you wish, though keep in mind that our instructions are based on using the default Zoom folder. 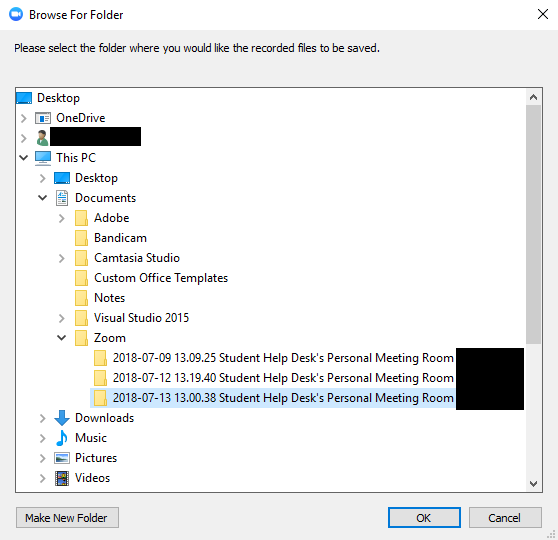 Zoom provides you with multiple files within this folder:
- The .mp4 will include any screens or video that were displayed in the room while recording.
- The .m4a file will provide just the audio that was recorded in the room.
- The .m3u file can be disregarded unless you had a recording that was saved in multiple parts (using the pause function located in the Zoom toolbar while recording).
Step 4: Upload and share Zoom recording files via Google Drive
- Navigate to where you saved the Zoom recording files in the steps above
- Sign in to your PCC Google Drive account
- Go to mail.google.com/a/pcc.edu
- Sign in with your MyPCC credentials
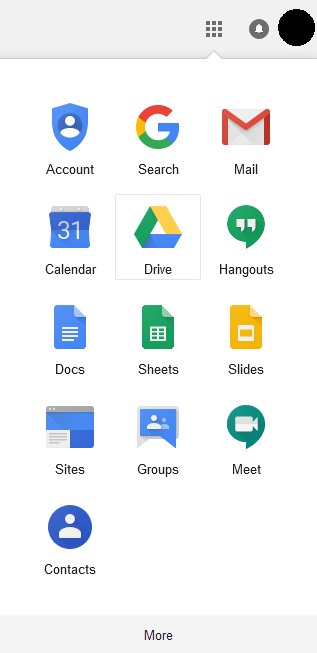
- Click the Apps button near the upper right hand corner of your account
- Click the Drive option
- Create a folder within your Google Drive that includes your course name, CRN and your name to easily identify you (e.g. BA 101 12345 Poppy Panther)
- Click the New button and choose Folder to create a folder within your Google Drive account
- Upload the folder created by Zoom that contains all the recording files (look above in “Step 3: Using and Recording a Zoom meeting room”)
- If you are making multiple recordings for the same course then you do not have to create a new folder within Google Drive for each one – simply upload each folder that Zoom creates into the Google Drive folder you created for the course.
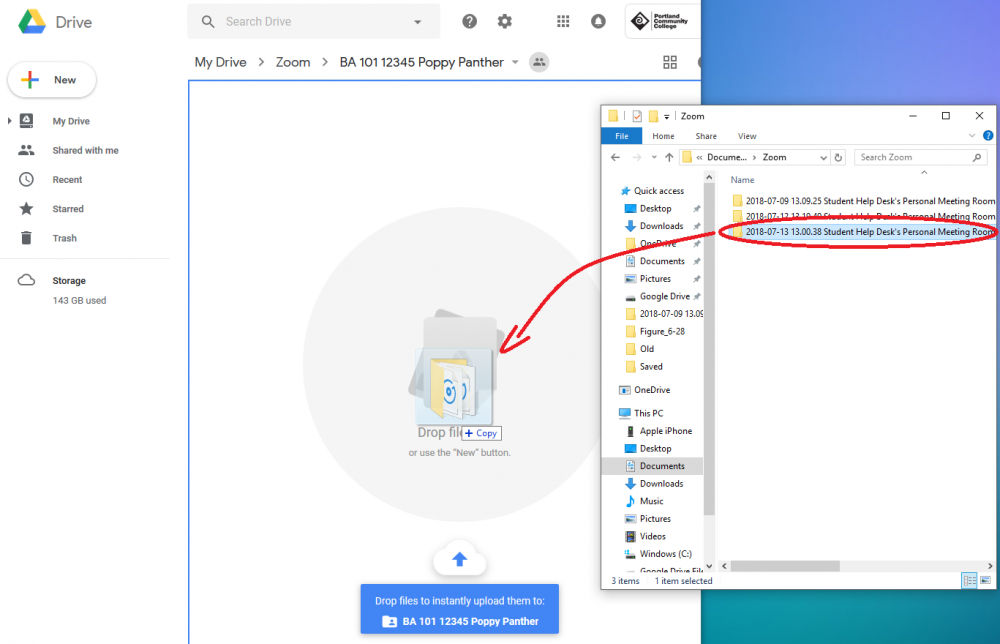
- If you are making multiple recordings for the same course then you do not have to create a new folder within Google Drive for each one – simply upload each folder that Zoom creates into the Google Drive folder you created for the course.
- Right-click (Control + click for Mac) on the course folder’s name (e.g. BA 101 12345 Poppy Panther) and choose Get shareable link
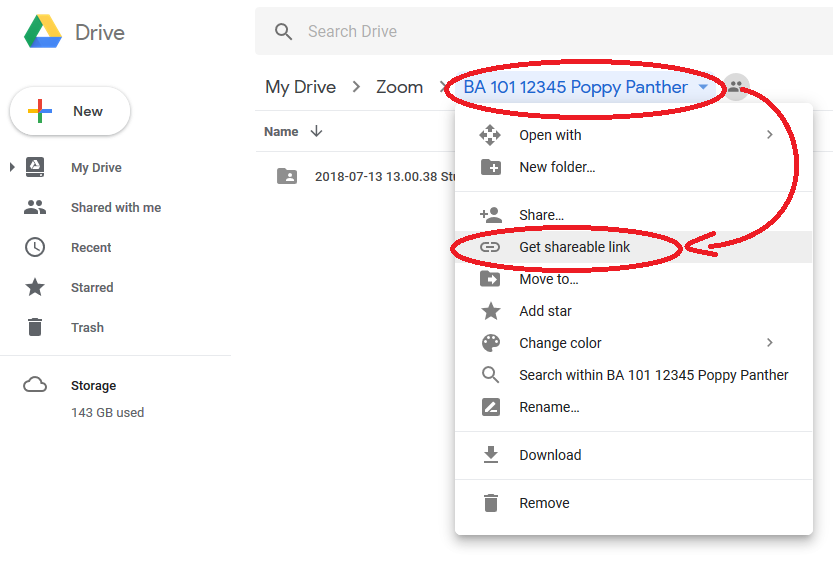
- Click the Link Sharing On toggle to display the URL that you can copy and share with your instructor or others that need access to the recording files

Note: By creating a Google Drive folder and following the method above you should only have to provide the URL to this folder once to anyone that needs access. Any additional files/folders you add to this folder in Google Drive should be view-able via the same URL you provided initially.
More information about using Google Drive:
- How to share folders & manage permissions in Google Drive
- How to upload files and folders to Google Drive
If you have any questions, contact the Student Help Desk by phone at 971-722-8222 or by email at shd@pcc.edu. For current business hours please visit the Student Help Desk page.