Entering Time Worked and Leave Time
Once you have performed the steps detailed in the previous section, enter your time worked and any leave time you have taken. Here are these steps.
-
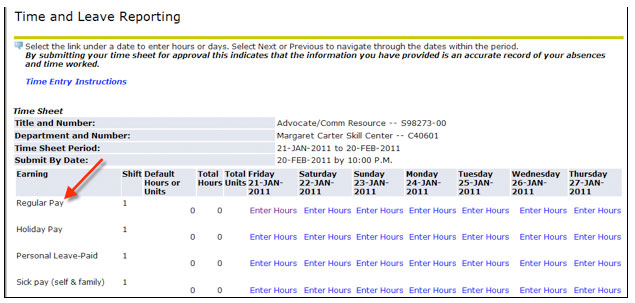
- You will see a screen showing the first week of the pay period. Since the pay period is the 21st to the 20th, the weeks will not always appear in the traditional Sunday – Saturday format. It will show the first 7 days of the pay period. If the pay period starts on a Thursday, it will show the week as Thursday through Wednesday.
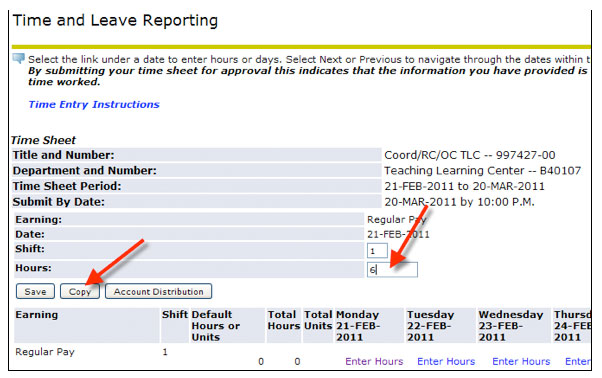
- Find the date you need to enter time for. Use the
 and
and  buttons to see additional days in the pay period.
 - Look through the list of “Earnings” to find the type of leave you want to report. For that time you worked, choose the “Regular Pay” Earnings.
-
- Click on the “Enter Hours” link that corresponds to the Earning type and date.

-
- Enter the number of hours for that Earning type on that date.
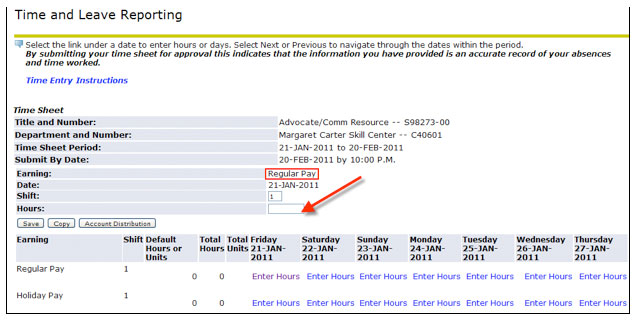
- Click the
 button. NOTE: The screen will stay on this Earning type until you select a different one. For example, if you are entering personal leave and click the
  button, it will still be in the personal leave time but on a different day.
 - After entering your leave time, select one of the following buttons at the bottom of the time sheet to continue:
 This button returns you to the Time Sheet Selection screen where you can pick a different time sheet if you have more than one.
  This button allows you to make comments that will stay attached to your time sheet.
  This button will give you a preview of the time you have entered. Please preview your time sheet before submitting.
  This button submits your time sheet to the manager for review and approval
  This button takes you to a web page to enter your in-district mileage for reimbursement.
  This button will delete all entries and start the time sheet over from scratch.
  This button will move the time sheet dates to the next week in the pay period.
  This button will move the time sheet dates to the previous week in the pay period. If you are on the first week of the pay period, this button will not show.
Copying Time to Multiple Days:
If you have to enter the same number of hours for multiple days, you can use the copy function. When you click on “Enter Hours” for a day it brings up a screen where you can select “Copy”. Enter the number of hours that will repeat for each day and then click on the “Copy” button.
Click the checkbox under each day that you want to repeat the Earnings (i.e., vacation, regular pay, etc.) and the hours.

When you are finished selecting the days, click the button at the bottom of the screen.
You will see a message at the top that confirms the hours were copied. 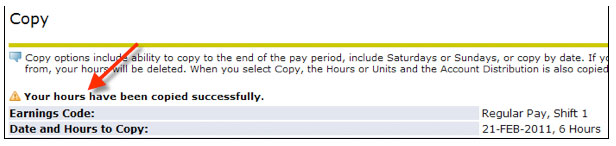
Click the  button at the bottom of the screen to return to the timesheet.
Exiting: To exit the time sheet and return to MyPCC, click on the 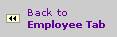 located in the upper left corner of your screen.
OR You can click the tabs across the top  to go to a Banweb menu.