Entering Time Worked
Once you have performed the steps detailed in the previous section, enter your time worked by following these steps.
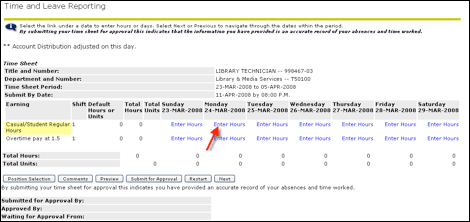
- You will see a screen showing the first week of the pay period Starting with the first day you worked, click on the “Enter Hours” link located just below the date. Make sure you select the “Enter Hours” link associated with the line “Casual/Student Regular Hours”.If hours worked exceed 40 hours for a Sunday – Saturday week, use “Overtime pay at 1.5” for all hours worked over 40 for the week.
- Enter the Time In and Time Out for the day
- Be sure to pay attention to the AM/PM!!
- Time is entered in 15 minute increments Round up or down to the nearest 15 minutes (i.e 5:05pm would be entered as 5:00pm or 5:10pm would be entered as 5:15pm) Note: Noon is 12:00 PM
- Instead of using a : (colon) between hours and minutes, you can use the . (period)
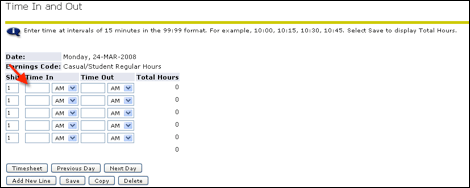
- After entering your time worked, select one of the following buttons at the bottom of the time sheet to continue:
 This button returns you to the original time sheet screen, where you can select another day or another earning, submit for approval or exit The time entered will be saved.
 This button moves you back to the Time In and Out page for the Previous Day The time entered will be saved.
 This button moves you to the next day of the pay period The time you entered will be saved.
 If you need to enter more than six “Time In” and “Time Out” lines for a single day, you can click this button to add more blank lines and enter more time It will only add lines if all the lines on the screen are completed first.
 This button Saves your time entered You can return later to enter additional time to this day, as needed.
 If you work the same schedule for multiple days in the pay period, click this button after entering your time and you can copy the entry to other days during the pay period (See “Copy” instructions below)
 This button will delete all data you have entered for this day.
Entering time for the 2nd week of the pay period
The Time and Leave Reporting screen shows one week at a time To go to the 2nd week of the pay period, click the  button.
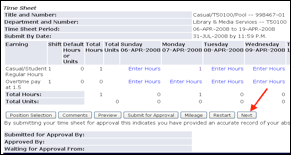
When you are viewing the 2nd week and want to return to the 1st week, where the button was, it now says  . Click the button.
Exiting
To exit the time sheet and return to MyPCC, click on the  located in the upper left corner of your screen.
OR
You can click the tabs across the top  to go to a Banweb menu.
How to Copy a Schedule to Multiple Days
When you click on the  button it takes you to this screen:
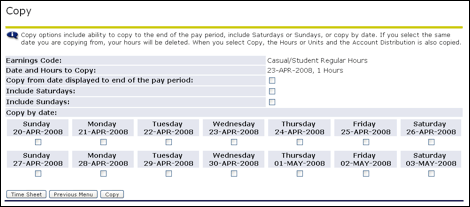
To pick specific days to copy to, “check” the box below each day you want to copy your previously specified hours to.
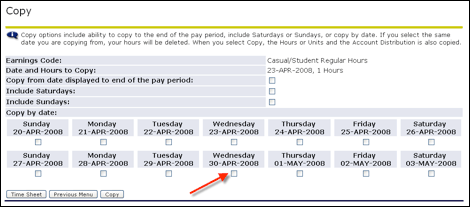
To copy to every standard Monday thru Friday work day, click the “Copy from date displayed to end of pay period” box.
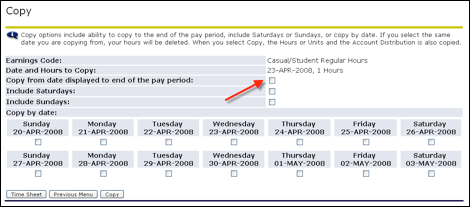
To include Saturdays, “check” the box next to “Include Saturdays”

To include Sundays, “check” the box next to “Include Sundays”
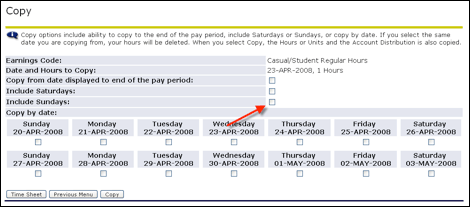
Once all the correct boxes have been checked, click on the  button.
Look for the message at the top to confirm the Copy is successful.

Click the  button to return to the time sheet and confirm that the hours you have entered are correct.