The Start Guide for Online Learning
 The Online Learning department has developed a “start guide” for students who want to take their first online class at PCC. The primary purpose of this experience is to improve student success in online classes. This prerequisite activity will help prepare students for the rigors of online coursework, and allow the student to decide if online courses are appropriate – before they register for an online course.
Why is it required?
The start guide improves student success. We have spent the last several years working with instructors, students, advisors, and others to see how we can help students improve their success rates in online classes. We found that even the most competent technology users are often unaware of all the resources the college provides to support their success.
Who is it for?
The online start guide is designed for students who are new to online learning at PCC. Students who have already taken an online course at PCC will not be required to complete the start guide again. The online start guide only applies to credit earning online classes listed as “Online” in the class schedule. Non-credit or community education classes do not require completion of the start guide.
How do I get started?
You can complete the online start guide anytime, anywhere you have an internet connection. You don’t have to come to campus or make an appointment. To access the start guide:
- Log in to your MyPCC account
- Select the My Courses tab
- Under the Ready to take online classes? heading, click on the “Start Guide for Online Learners” link
This will take you to the first page of the online start guide. If you have any problems accessing the start guide, please contact the Student Help Desk for assistance.
How does it work?
- The prerequisite “course” is self-paced and can be completed any time after admission.
- Students will be notified of the requirement prior to registration and provided with instructions for accessing and completing the guide.
- The guide modules must be completed and submitted prior to registration for your first online class.
- The modules should take about 30 minutes to complete.
What will I learn?
The start guide experience is intended to help students understand if they are prepared to take their first online class, if they have the necessary skills and resources to succeed, and offer tips to help them plan for success. The start guide modules address:
- study skills
- technology skills
- academic integrity
- student support services
- individual attributes
- life factors
- learning styles
- what to expect in your first online class
Am I done?
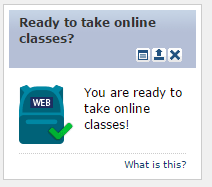 If you’re not sure if you successfully completed the online start guide, you can check your MyPCC account. On the My Courses tab, look for the Ready to take online classes? channel. If you see a blue backpack with a green check mark, you are ready to register for online classes. If you don’t see the green check mark, you have not completed all the start guide modules yet and will need to do so before you can register for an online class.
Additional support
For more information, support and answers to common questions about the Online Start Guide, please refer students to the Student Help Desk and their Start Guide for Online Learning support page.