Create an EPAF – Step 5
Entering the job end date and specifying the approval queue
The next section is for specifying when the job will end, followed by a section for indicating who will approve and finalize your EPAF.
‘Terminate a job’ section
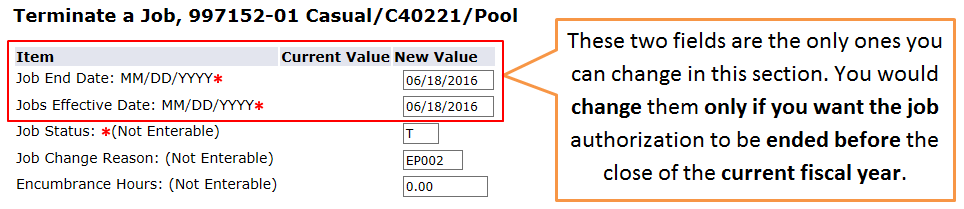 If it later turns out that the job needs to be terminated before the Job End Date you indicated on the EPAF, you can correct it using a MAP form
‘Routing queue’ section
The Routing Queue (or Approval Queue) section is for specifying who will approve your EPAF. If you have already set up your default routing queue beforehand, you can disregard this section.
Use the ‘Magnifying Glass’ search icon to find the login name associated with the person you’re looking for.
- Type in the Banner login name of your HRIS Specialist on the first line
- Type in the Banner login name your supervising manager on the second line
- Type in the Banner login name of the Manager of HR systems development (currently Julie Kinney) on the third line
Click “SAVE and Add New Rows” when you’re done.
FYI option
You can also set someone up as an “FYI” — someone who can review EPAFs and acknowledge that they are correct but not approve them. Your manager can then view the EPAF and see that the FYI has “acknowledged” that it’s OK.
Before you can set up an employee as an FYI, first contact Dawn Hoyt in Human Resources to get the employee added to the drop-down list. Then, use one of the extra lines provided in the EPAF Routing Queue section to set up the FYI, making sure to choose “FYI” as the Approval Level and Required Action.
Comments
For Substitution EPAFs, the Comments block is used.
Type in the date(s) of the substitution(s) and who the person substituted for. This way you will have the information for your records in case you need to refer back later.
Please note that comments will become part of the Banner EPAF record and cannot be changed.
Save and submit
Whether or not you add a Comment, click the Save button located at the top of the screen when you’re done.
Next, press the Submit button.
If submitted successfully, your EPAF now moves to the Approver’s queue for approval.

Errors and warning messages
If you received Errors or Warning messages, don’t be alarmed. In many cases these can be disregarded, but some Errors must be addressed before your EPAF is submitted successfully. If you didn’t get the “successfully submitted” message shown in the illustration above, there is probably an Error you must address.
Therefore, the next step is to Review Errors and Warning Messages.