Remove all content in your D2L course
If you accidentally made duplicates while copying your course content or accidentally copied the wrong course content, there is now an easy way to reset it!
Contact the Faculty Help Desk to have a system administrator reset your course for you. This shouldn’t be done if students are already participating in your course.
- Who is this for: Online Instructors
- What is required: A D2L Brightspace class that contains the wrong content or duplicate content
If resetting the whole course isn’t practical for some reason, the previously recommended method for removing material from different aspects of your course is still available. Follow the steps below depending on which area that you want to reset in your course.
Step 1: Delete Announcements
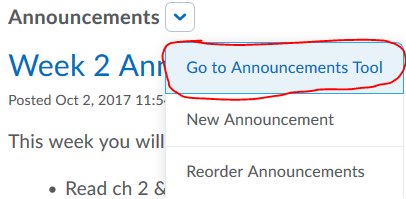
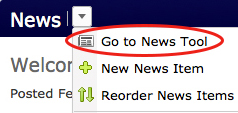
To begin, click on your course homepage and locate the Announcements widget.
- Click the Announcements action menu and select Go to Announcements Tool.
- Check the box at the top to select all the announcements and click Delete.
- Click Yes on the confirmation window. Repeat the process if you have more announcements.
Step 2: Delete Course Files
- From the navbar, go to Course Admin link.
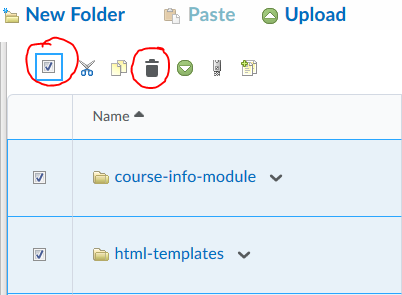
- Click on Manage Files.
- Check the box at the top to select all the folders and files and click the Delete button.
- Click Yes on the confirmation window.
Step 3: Delete Content
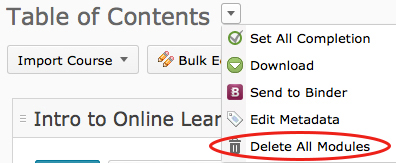
- From the navbar, go to Content and select Table of Contents on the left side.
- Click the action menu from Table of the Content at the top and select Delete All Modules.
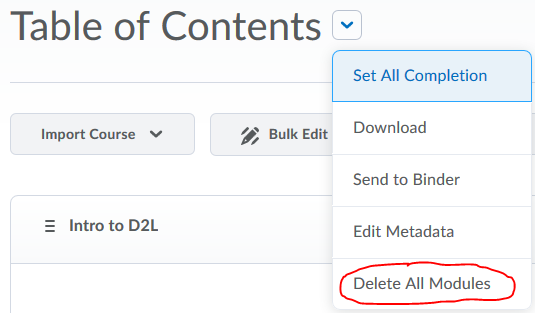
- Choose the second option: “Permanently delete all modules, topics, and all associated files and activities from the course” and click the Delete button.
Step 4: Delete Assignments
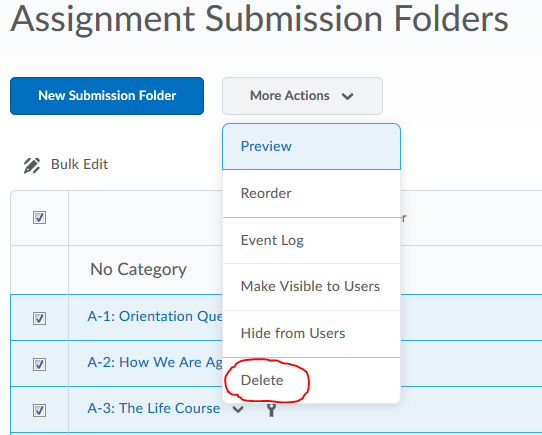
- From the navbar, go to Assignments.
- Check the box at the top to select all the Assignments.
- Click the action menu for More Actions and select Delete.
Step 5: Delete Discussions
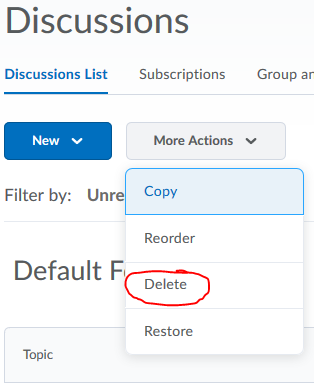 From the navbar, go to Discussions.
- Click the action menu for More Actions and select Delete.
- Check the box next to “Select all” and click the Delete button. There’s no confirmation message, so continue following the next step.
Step 6: Delete Quizzes and questions in Question Library
- From the navbar, go to Quizzes.
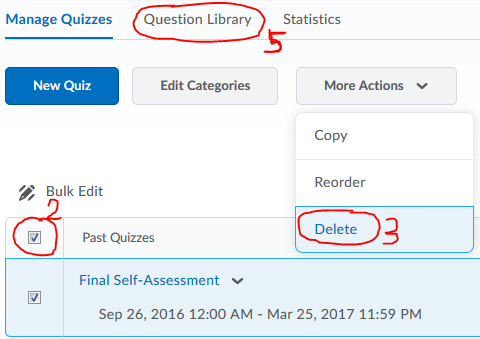
- Under Manage Quizzes, check the box at the top to select all quizzes.
- Click the action menu for More Actions and select Delete.
- Click the Delete button on the confirmation window.
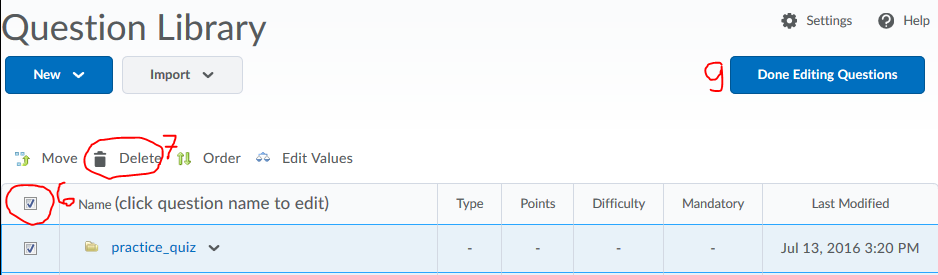
- Click on the Question Library link.
- Check the box at the top to select all the folders and questions.
- Click the Delete button.
- Click the Delete button again on the confirmation window.
- Click the Done Editing Questions button to go back to the Quizzes area.
Step 7: Delete Grade Items
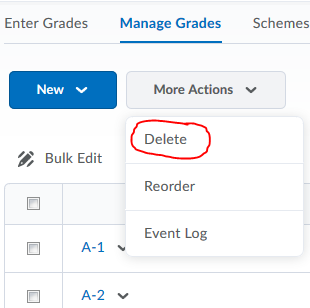 From the navbar, go to Grades.
- Click Manage Grades tab.
- Click the action menu for More Actions and select Delete.
- Check the box at the top to select all items and click the Delete button.
- Click the Delete button again on the confirmation window.
Note: You will not be able to delete grade item if it still have an association with an activity (e.g. discussion, assignment, or quiz). However, if you already follow everything until Step 6, everything in your course should be clean, so you should be safe deleting everything in the Grades area.
Step 8: Delete Rubrics
 From the navbar, go to Grades.
- Click Course Admin on the Navbar.
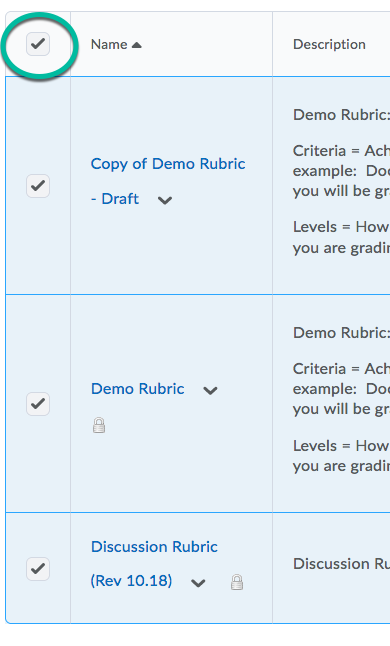
- Click on Rubrics which is usually located under the Assessment heading
- To delete all the Rubrics in the course, Click in the checkbox located in the upper left corner of the table. This will place a check mark in the checkbox for each Rubric that is in the course.
- Click on the Trash Can Icon located above the list of Rubrics that are in your course
- Click on the Delete button on the pop-up menu to confirm and delete the Rubrics.
Step9: Custom Tools
It’s probably best to check if you have custom Homepages, Navbars or Widgets.
Delete custom homepages
You need to delete all custom homepages in here one at a time. You can only delete the custom homepage (blue color) and not the organization’s homepage (black color). When you copy the correct course into this one, your custom homepage will be applied automatically.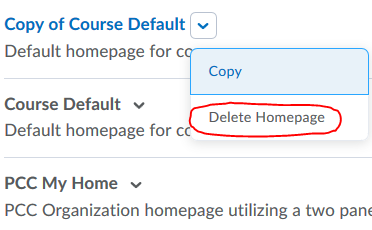
- From the navbar, go to Course Admin link.
- From the Course Administration area, click Homepages.
- Change the Active Homepage to “Course Default” and click Apply.
- Click on the action menu next to each custom homepage and select Delete Homepage.
- Click the Yes button on the confirmation window.
Delete custom widgets
You need to delete all custom widgets in here one at a time. You can only delete the custom widgets that you created (if you see the trashcan icon). When you copy the correct course into this one, your custom widgets will be listed in here.
- From the navbar, go to Course Admin link.
- From the Course Administration area, click Widgets.
- Click the Delete icon next to the widget that you would like to delete.
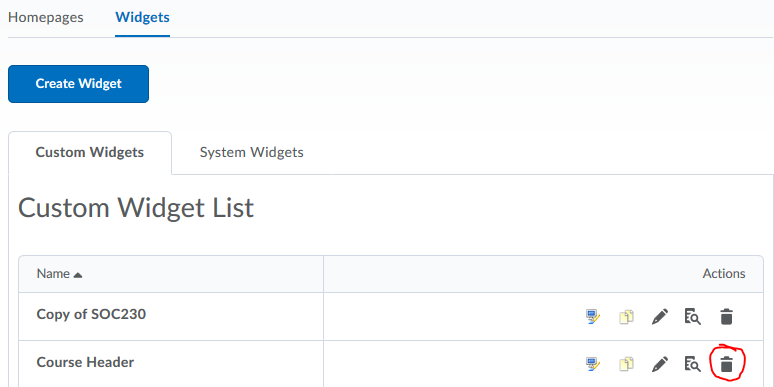
- Click the Delete button again on the confirmation window.
Delete custom navbars
You need to delete all custom navbars in here one at a time. You can only delete the custom navbars that you created (blue color) and not the organization’s homepage (black color). When you copy the correct course into this one, your custom navbar will be applied automatically.
- From the navbar, go to Course Admin link.
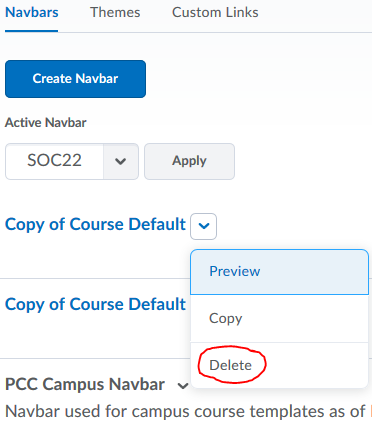
- From the Course Administration area, click Navigation & Themes.
- Change the Active Navbar to “PCC Default Navbar” and click Apply.
- Click on the action menu next to each custom homepage and select Delete.
- Click the Yes button on the confirmation window.
You should have an empty shell now and only one area should stay untouched is your Classlist. It should still have all you students listed. Now you can go back to Export/Import/Copy Components and copy the correct course.